Looking for a vibrant dessert that’s as visually stunning as it is delicious? This Fruit Basket Cake Recipe is the perfect centerpiece for birthdays, summer picnics, brunches, or any special occasion.
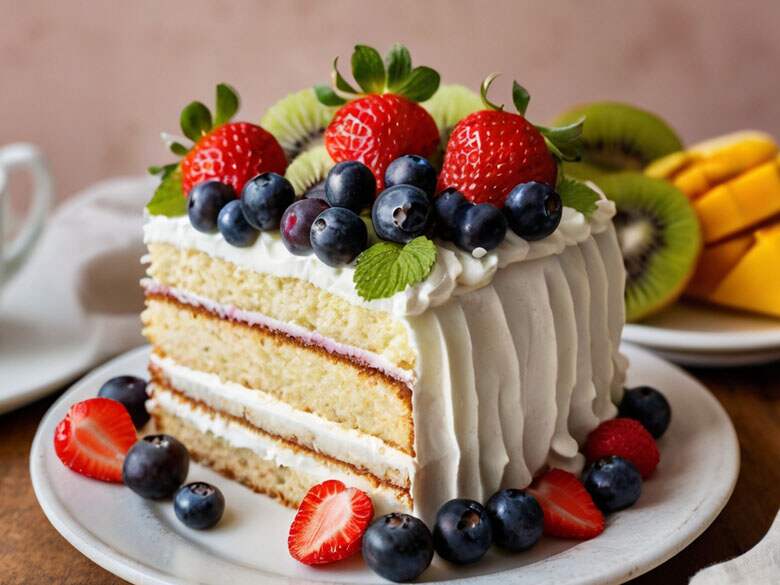
Combining a fluffy vanilla cake base with velvety whipped cream and a medley of fresh, juicy fruits, this cake looks like a delightful fruit basket—but tastes even better! It’s light, refreshing, and naturally sweet, making it a healthier choice compared to traditional frosting-heavy cakes.
Not only is this recipe visually impressive, but it’s also surprisingly easy to make.
Whether you’re a beginner baker or a seasoned pro, this recipe will help you craft a dessert that earns applause at the table.
The blend of colors, textures, and flavors in this fruit basket cake recipe makes it a feast for the eyes and the palate. Let’s dive into this fruity masterpiece step by step.
My Experience Making This Fruit Basket Cake
The first time I made this fruit basket cake recipe was for my niece’s birthday, and it was an instant hit.
I loved how the fresh fruits added bursts of natural flavor, and the cake looked like something straight out of a bakery window.
It’s now a go-to whenever I want to impress guests without spending hours in the kitchen!
Equipment Needed
- 2 9-inch round cake pans
- Mixing bowls (large and medium)
- Electric hand mixer or stand mixer
- Rubber spatula
- Offset spatula
- Cooling rack
- Cake turntable (optional but helpful)
- Serrated knife (for leveling)
- Piping bag (optional)
Ingredients List
For the Cake:
- 2 ½ cups all-purpose flour
- 2 ½ tsp baking powder
- ½ tsp salt
- ¾ cup unsalted butter (room temperature)
- 1 ¾ cups granulated sugar
- 4 large eggs
- 1 tbsp vanilla extract
1 cup whole milk
For the Whipped Cream Frosting:
- 2 cups heavy whipping cream
- ⅓ cup powdered sugar
- 1 tsp vanilla extract
For the Fruit Topping:
- ½ cup strawberries, sliced
- ½ cup blueberries
- ½ cup kiwi, peeled and sliced
- ½ cup mango, diced
- ½ cup red grapes, halved
- Mint leaves (for garnish, optional)

Fruit Basket Cake Recipe – Step-by-Step Preparation
Step 1:
Preheat and Prep: Preheat your oven to 350°F (175°C). Grease and line two 9-inch cake pans with parchment paper. This helps the cake release cleanly and evenly.
Step 2:
Make the Dry Mix: In a medium bowl, whisk together the flour, baking powder, and salt. Set aside.
Step 3:
Cream Butter and Sugar: In a large bowl, beat the butter and sugar until light and fluffy (about 3–4 minutes). Add eggs one at a time, mixing well. Stir in the vanilla extract.
Step 4:
Combine Wet and Dry Ingredients: Gradually add the dry mix to the wet ingredients, alternating with milk. Mix just until combined—don’t overmix or the cake could turn dense.
Step 5:
Bake: Divide batter evenly between the two pans. Bake for 25–30 minutes, or until a toothpick inserted in the center comes out clean.
Let cakes cool in the pans for 10 minutes, then transfer to a wire rack to cool completely.
Step 6:
Make the Whipped Cream: Whip the cold heavy cream with powdered sugar and vanilla until stiff peaks form. Keep it chilled until ready to use.
Step 7:
Assemble the Cake: Level your cake layers using a serrated knife if needed.
Place one layer on a serving plate, spread a thick layer of whipped cream, and top with a mix of fresh fruits. Add the second cake layer and frost the top and sides.
Step 8:
Decorate with Fruits: Arrange sliced and whole fruits on top like a colorful fruit basket. Add a few mint leaves for an elegant finish. Chill until ready to serve.
Tips for Success
- Chill Your Bowl and Beaters – This helps achieve stiff peaks faster when making whipped cream.
- Use Fresh, Seasonal Fruits – They offer better flavor and visual appeal.
- Don’t Overmix the Batter – Overmixing can result in a dense cake.
- Cool Cake Completely Before Frosting – Warm cake will melt the whipped cream.
- Serve Immediately or Chill – The whipped cream and fruit taste best fresh and cool.
Variations to Try
- Chocolate Base – Swap the vanilla cake for chocolate to create a Black Forest-inspired version.
- Coconut Cream Frosting – Replace whipped cream with coconut cream for a tropical twist.
- Mini Basket Cakes – Make cupcakes and top each with cream and fruit for individual servings.
- Gluten-Free Option – Use a gluten-free flour blend instead of all-purpose flour.
- Add Fruit Jam – Spread a thin layer of your favorite fruit jam between the layers for added depth.
Conclusion
This fruit basket cake recipe brings together the best of both worlds: a deliciously soft cake and the natural goodness of fruits.
It’s a delightful showstopper that’s perfect for any celebration or casual get-together. Make it once, and you’ll keep coming back for more!
FAQs
Can I use canned or frozen fruit in this recipe?
While fresh fruit is recommended for the best texture and presentation, you can use canned or frozen fruit in a pinch.
However, make sure to drain or thaw them completely and pat them dry to avoid a soggy cake.
How do I store a fruit basket cake?
This fruit basket cake should be stored in the refrigerator, preferably in a cake container or covered with plastic wrap.
It’s best enjoyed within 2 days, as the fresh fruits and whipped cream can start to break down after that.
Can I add a glaze to the fruit topping?
Definitely! A light fruit glaze made from apricot jam and water can be brushed over the fruits to give them a glossy finish and help preserve freshness. It’s an optional but beautiful touch.
Fruit Basket Cake Recipe
Equipment
- 2 9-inch round cake pans
- Mixing bowls (large and medium)
- Electric hand mixer or stand mixer
- Rubber spatula
- Offset spatula
- Cooling rack
- Serrated knife (for leveling)
Ingredients
For the Cake:
- 2 ½ cups all-purpose flour
- 2 ½ tsp baking powder
- ½ tsp salt
- ¾ cup unsalted butter room temperature
- 1 ¾ cups granulated sugar
- 4 large eggs
- 1 tbsp vanilla extract
- 1 cup whole milk
For the Whipped Cream Frosting:
- 2 cups heavy whipping cream
- ⅓ cup powdered sugar
- 1 tsp vanilla extract
For the Fruit Topping:
- ½ cup strawberries sliced
- ½ cup blueberries
- ½ cup kiwi peeled and sliced
- ½ cup mango diced
- ½ cup red grapes halved
- Mint leaves for garnish, optional
Instructions
- Preheat and Prep: Preheat your oven to 350°F (175°C). Grease and line two 9-inch cake pans with parchment paper. This helps the cake release cleanly and evenly.
- Make the Dry Mix: In a medium bowl, whisk together the flour, baking powder, and salt. Set aside.
- Cream Butter and Sugar: In a large bowl, beat the butter and sugar until light and fluffy (about 3–4 minutes). Add eggs one at a time, mixing well. Stir in the vanilla extract.
- Combine Wet and Dry Ingredients: Gradually add the dry mix to the wet ingredients, alternating with milk. Mix just until combined—don’t overmix or the cake could turn dense.
- Bake: Divide batter evenly between the two pans. Bake for 25–30 minutes, or until a toothpick inserted in the center comes out clean. Let cakes cool in the pans for 10 minutes, then transfer to a wire rack to cool completely.
- Make the Whipped Cream: Whip the cold heavy cream with powdered sugar and vanilla until stiff peaks form. Keep it chilled until ready to use.
- Assemble the Cake: Level your cake layers using a serrated knife if needed. Place one layer on a serving plate, spread a thick layer of whipped cream, and top with a mix of fresh fruits. Add the second cake layer and frost the top and sides.
- Decorate with Fruits: Arrange sliced and whole fruits on top like a colorful fruit basket. Add a few mint leaves for an elegant finish. Chill until ready to serve.
Notes
- Chill Your Bowl and Beaters – This helps achieve stiff peaks faster when making whipped cream.
- Use Fresh, Seasonal Fruits – They offer better flavor and visual appeal.
- Don’t Overmix the Batter – Overmixing can result in a dense cake.
- Cool Cake Completely Before Frosting – Warm cake will melt the whipped cream.
- Serve Immediately or Chill – The whipped cream and fruit taste best fresh and cool.