

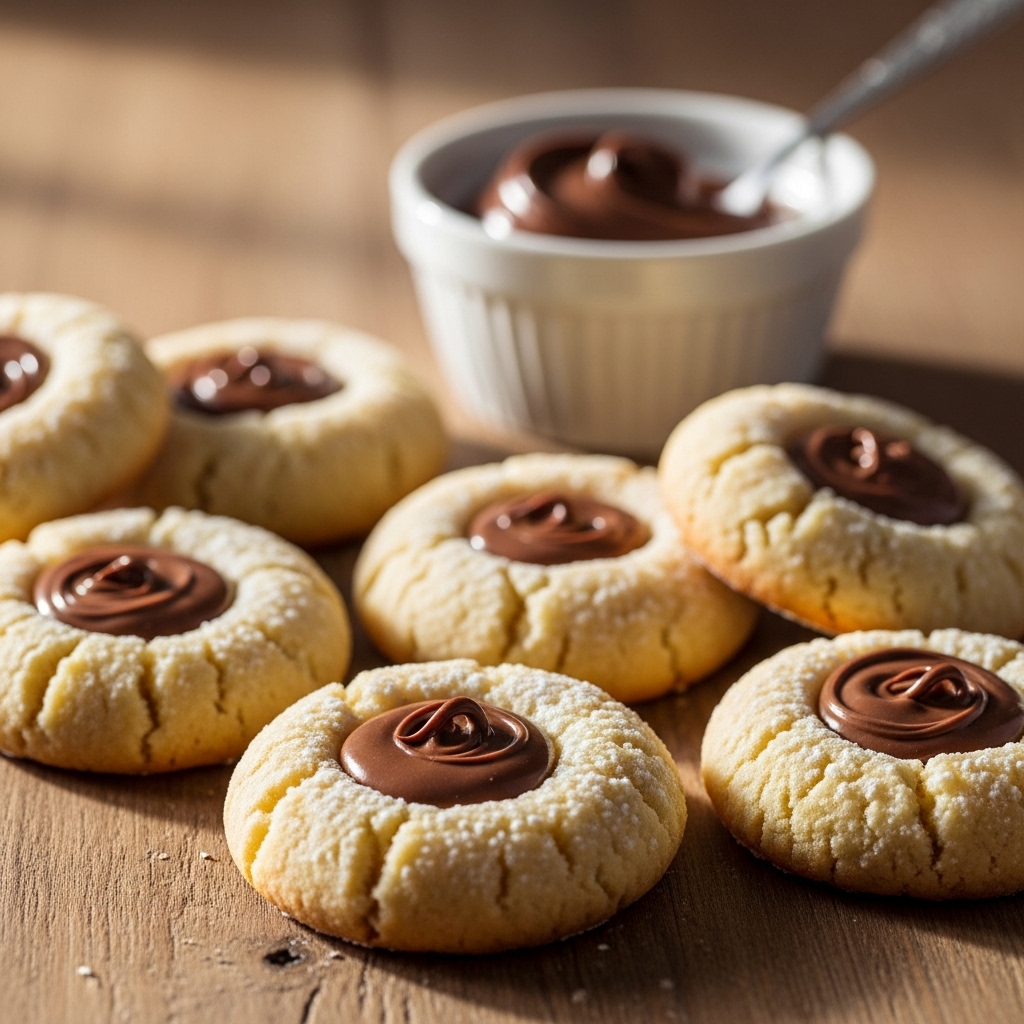
Soft, buttery, and filled with rich chocolate-hazelnut goodness. That is what Nutella thumbprint cookies taste like. A tender shortbread-style dough, a smooth Nutella center, and a texture that stays soft and chewy for days. This guide covers the Nutella thumbprint cookies recipe in full depth, from the exact ingredients and the twelve-step method to variations, what to serve with them, and how to store the leftovers for a busy holiday week.
If you want a holiday cookie that looks as good as it tastes, these cookies are the answer. They need just six ingredients, one bowl, and about half an hour from start to finish. The dough comes together in minutes, the cookies bake in twelve minutes, and the whole batch is ready before the oven has even cooled down. Follow the steps below and you will get beautiful, gift-worthy cookies with glossy Nutella centers every single time.
For more holiday baking for cold nights, see our Easy Winter Cookie Recipes for Cozy Holiday Baking.
The full original recipe this guide is based on is the Nutella Thumbprint Cookies Recipe, with the same ingredients, times, and method used below.
Why Nutella Thumbprint Cookies Belong on the Holiday Table
The holidays ask a lot of the cook. There are big meals to plan, guests to feed, and a table that needs to look generous without keeping you in the kitchen all day. Nutella thumbprint cookies fit that moment perfectly. They are quick to make, they feed a crowd from a single small batch, and they look like something from a bakery. A tray of these cookies, with their glossy chocolate centers and golden edges, looks festive on any dessert table, and they disappear faster than almost anything else you bake.
They also solve the most common problem with holiday baking: time. Between the main meal, the side dishes, and the guests arriving, nobody has hours to spend on dessert. These cookies need one bowl, one baking tray, and about ten minutes of active work. The dough requires no special skills, the process stays easy and relaxing, and the cookies bake in twelve minutes. You can bake them in the morning and serve them at dinner, or bake them the day before and store them in an airtight box.
Nutella thumbprint cookies also suit every taste at the table. Kids love these cookies instantly: the chocolate center is sweet and familiar, and the little thumbprint shape makes them fun to eat. Adults enjoy the nostalgic flavor deeply, because the combination of buttery shortbread and chocolate-hazelnut spread tastes like childhood. They work for a Christmas cookie box, a school bake sale, a holiday party, or a quiet evening with a mug of hot chocolate. Bake a batch and you will have a tray that empties within minutes.
There is something else that makes these cookies special: they are made for sharing. The dough is simple enough for kids to help with, from rolling the balls to pressing the centers and filling them with Nutella. Baking together is one of the best holiday traditions a family can have, and these cookies are the perfect recipe to start with. The rich Nutella swirl adds charm, the aroma fills the kitchen fast, and the result is a cookie that brings smiles every time.
What Makes These Nutella Thumbprint Cookies So Good
The first thing is the dough. One cup of flour, half a cup of butter, a quarter cup of sugar, a teaspoon of vanilla, and a pinch of salt make a simple shortbread-style dough that melts in your mouth. The butter is the star: use soft butter always, and the dough turns out rich and tender. The sugar is deliberately light, so the cookie itself is not too sweet, and the Nutella brings the sweetness where it belongs, in the center.
The second is the Nutella center. Half a cup of Nutella fills every cookie with a rich, smooth chocolate-hazelnut swirl. Good-quality Nutella matters here, because the center is the main flavor. The Nutella softens slightly in the oven and sets into a glossy, spoonable filling as the cookies cool. Do not overfill the centers: a small spoonful in each thumbprint is enough, and overfilling makes the Nutella run over the edges.
The third is the texture. The cookies stay soft and chewy, with edges that bake just firm enough to hold their shape. The dough is mixed until it just forms, never overworked, so the cookies stay tender instead of tough. The contrast between the buttery cookie and the smooth chocolate center is what makes every bite taste warm and comforting.
The fourth is the simplicity. Six ingredients, one bowl, and a method a beginner can follow with confidence. There is no chilling for hours, no rolling and cutting, no decorating skill needed. The cookies look adorable on trays exactly as they come out of the oven, and a few sprinkles add color if you want them to look extra festive. Simple does not mean plain: these cookies prove that a short ingredient list can make something truly special.
Ingredients You Need for Nutella Thumbprint Cookies
This recipe uses just six ingredients, and every one of them earns its place. Measure everything before you start so the dough comes together quickly and the butter stays at the right temperature.
For the dough, you need one cup of flour, half a cup of butter, a quarter cup of sugar, one teaspoon of vanilla, and a pinch of salt. The flour gives the cookies their structure, so spoon it into the measuring cup and level it off instead of scooping straight from the bag, which packs in too much flour. The butter must be soft but not melted: it should dent easily when you press it with a finger, and it should hold its shape. Soft butter mixes smoothly with the sugar, while melted butter makes the dough greasy and the cookies flat. Take the butter out of the fridge about thirty minutes before you start baking.
The vanilla brings warmth to the dough and rounds out the chocolate flavor. Use real vanilla extract if you can, because its flavor is deeper than imitation vanilla. The pinch of salt is small but important: it sharpens the sweetness of the Nutella and keeps the cookie from tasting flat. Without salt, the whole cookie tastes one-note.
For the filling, you need half a cup of Nutella. Use good-quality Nutella, because the center is the main flavor of the cookie. If your Nutella is very thick from a cold kitchen, warm the jar for a few seconds in the microwave or sit it in warm water for a minute so it spoons easily into the thumbprints. Do not melt it fully: you want it soft and spoonable, not runny.
A note on the amount: this small batch makes about sixteen cookies, which is perfect for a gift box or a dessert tray. If you need more, double the recipe exactly and bake the trays one at a time so every cookie bakes evenly.
Equipment You Will Need
You do not need any special equipment for these cookies. A mixing bowl holds the dough, and a whisk or spoon mixes the butter and sugar smoothly. Measuring cups and measuring spoons keep the ingredients accurate, and a baking tray lined with parchment paper keeps the cookies from sticking and makes cleanup simple. A cooling rack lets the cookies cool evenly so the bottoms stay crisp instead of steaming soft. A small spoon fills the centers with Nutella neatly. No mixer is needed: the dough comes together easily by hand, which is part of what makes this recipe so relaxing to bake.
How to Make Nutella Thumbprint Cookies
Follow these twelve steps in order and the cookies will turn out soft, buttery, and beautiful every time.
- Preheat your oven to 350 degrees Fahrenheit. Line a baking tray with parchment paper. Starting with a fully heated oven matters: cookies that go into a cool oven spread too much before they set.
- Mix the butter and sugar. In a mixing bowl, stir the softened butter and the sugar together until the mixture is smooth and creamy. Use soft butter always, so the mixture comes together easily without lumps.
- Add the vanilla and salt. Stir in the teaspoon of vanilla and the pinch of salt, and keep stirring until the mixture is completely smooth. The vanilla should be evenly mixed through, with no streaks.
- Add the flour gradually. Add the flour a little at a time, stirring gently after each addition. Adding the flour gradually keeps the dough from getting lumps and stops it from becoming tough.
- Mix until the dough forms. Keep stirring just until the dough comes together into a soft ball. Stop as soon as it forms: do not overmix, or the cookies will turn out tough instead of tender.
- Chill the dough briefly. Keep the dough chilled for a short time, about fifteen minutes in the fridge, so it firms up slightly and holds its shape when you roll it. This brief chill is the secret to neat, round cookies that do not spread flat.
- Shape the dough into balls. Roll the dough into small, even balls, about one tablespoon each. Even sizes matter, because cookies of different sizes bake at different speeds.
- Place the balls on the tray. Set the balls on the parchment-lined baking tray, spacing them about two inches apart so they have room to spread slightly as they bake.
- Press the centers gently. Press the center of each ball gently with your thumb or the back of a small spoon to make a neat well. Do not press all the way through: the well should be deep enough to hold the Nutella, with a base of dough underneath.
- Fill the centers with Nutella. Spoon a small amount of Nutella into each well. Do not overfill the centers: a level teaspoon in each cookie is enough, and overfilling makes the Nutella run over the edges as it warms in the oven.
- Bake for twelve minutes. Bake the cookies until the edges are firm and lightly golden. The centers will still look soft, and that is correct: the cookies finish setting as they cool.
- Cool the cookies on a rack. Let the cookies rest on the tray for five minutes, then move them to a cooling rack and let them cool completely. The Nutella sets into a glossy filling as the cookies cool, so do not move them while it is still hot and runny.
The Secret to Soft Nutella Thumbprint Cookies
The first secret is soft butter. Use soft butter always, and let it come to room temperature naturally. Butter that is too cold will not mix smoothly with the sugar, and the dough will be lumpy. Butter that is melted will make the dough greasy and the cookies flat. The right butter dents easily under a finger and holds its shape, and it creams into a smooth, pale mixture in under a minute.
The second secret is the brief chill. Keep the dough chilled briefly before shaping, about fifteen minutes, and the cookies will hold their round shape in the oven. Skipping the chill is the most common reason thumbprint cookies spread into flat discs. The chill does not need to be long: fifteen minutes is enough for this small, buttery dough.
The third secret is gentle handling. Mix the dough only until it forms, roll the balls with light hands, and press the centers gently. Every extra squeeze pushes moisture out and packs the dough tighter, and tight dough means tough cookies. If the dough feels sticky on your hands, chill it for a few more minutes instead of adding extra flour, which would dry the cookies out.
The fourth secret is the filling. Do not overfill the centers. A small spoonful of Nutella in each well is enough, because the Nutella softens and spreads slightly as the cookie bakes. Overfilled cookies leak chocolate onto the tray, and the centers never set properly. If you want more chocolate flavor, serve the cookies with a mug of hot chocolate instead of adding more Nutella to the cookie.
Variations to Try
Sprinkles add color and make the cookies look extra festive. Add sprinkles for color around the Nutella center or on top of the filling while it is still soft. Red and green sprinkles suit a Christmas cookie box, gold sprinkles suit a New Year party, and pastel sprinkles suit a spring gathering. Press the sprinkles on gently right after baking, while the Nutella is still warm enough to hold them.
Chopped hazelnuts add crunch and deepen the hazelnut flavor. Sprinkle a few finely chopped toasted hazelnuts over the Nutella center while it is still soft. The nuts echo the hazelnut in the Nutella and give the cookies a bakery-style finish. A pinch of flaky sea salt on top works the same way, sharpening the chocolate flavor.
A chocolate drizzle dresses the cookies up for a party. After the cookies have cooled, drizzle melted dark chocolate in thin lines across the tops. The drizzle sets into a pretty pattern and adds a slight bitterness that balances the sweet Nutella. Let the drizzle set for a few minutes before stacking or packing the cookies.
Jam centers turn the same dough into a different cookie. Fill half the batch with Nutella and half with raspberry or strawberry jam for a cookie box with variety. The jam version bakes the same way and looks beautiful next to the chocolate centers. This is the easiest way to offer two cookies from one dough.
Peanut butter swirl is the version for peanut butter lovers. Swirl a small spoonful of smooth peanut butter into the Nutella before filling the cookies, or fill half the cookies with peanut butter instead of Nutella. The two spreads taste wonderful together, and the cookies look just as pretty. Keep the filling amount the same so the cookies bake the same way.
How to Tell When the Cookies Are Done
The most reliable test is the edge test. Look at the edges of the cookies: they should be firm and lightly golden, while the centers still look soft. Bake until the edges are firm, and take the tray out at twelve minutes even if the centers look pale. The cookies finish cooking on the hot tray during the five-minute rest, so waiting until they look fully done in the oven means they will be overbaked by the time they cool.
The second test is the touch test. Press the edge of a cookie very gently with a fingertip. It should feel firm and hold its shape, not feel soft and doughy. If the edge dents easily, the cookie needs another minute. If the whole cookie feels firm all the way through, it is probably already overbaked, so take the tray out right away.
The third test is time and smell. Twelve minutes at 350 degrees Fahrenheit is the time for this recipe, and most ovens land right on it. When the kitchen starts to smell like warm butter and chocolate, the cookies are close. Trust the clock and the edges together: set a timer for twelve minutes, check the edges, and add one minute at a time only if they still look soft.
Make-Ahead Tips for Busy Holiday Days
The dough can be made a day ahead and kept in the fridge. Mix the dough, cover the bowl tightly with plastic wrap, and refrigerate it overnight. Let it sit on the counter for ten minutes before shaping so it softens just enough to roll easily, then shape, fill, and bake as usual. The cookies taste just as good as fresh-mixed dough, and the extra chill makes them even neater.
You can also shape the dough balls ahead of time. Roll the dough into balls, press the centers, and refrigerate the tray for up to two days, covered tightly. Fill the centers with Nutella just before baking, so the filling stays glossy and fresh. This is the best option for a party day, because you can bake a fresh tray while guests are arriving and serve warm cookies.
Baked cookies keep well too. Let them cool completely, then store them in airtight boxes at room temperature for up to four days. Store cookies in airtight boxes with a sheet of parchment paper between layers so the Nutella centers do not stick to the cookies above them. The cookies stay soft and chewy, and the Nutella stays smooth, so they taste almost as good on day three as they did on day one.
For longer storage, freeze the baked cookies. Place them in a single layer on a tray and freeze until firm, then move them to a freezer bag with the air pressed out. They keep for up to three months. Thaw at room temperature for about thirty minutes. The Nutella softens again as the cookies thaw, so they taste fresh with no extra work.
What to Serve With Nutella Thumbprint Cookies
Hot chocolate is the classic pairing. Warm cocoa enhances the chocolate richness of the Nutella center, and the two together create cozy comfort instantly. A mug of hot chocolate with a plate of these cookies is the simplest holiday dessert there is, and kids love it as much as adults do. Add marshmallows to the cocoa and the whole thing feels like a celebration.
Vanilla ice cream is the second-best pairing. Cold ice cream balances the warm cookies beautifully, and the contrast tastes amazing. Serve a warm cookie next to a scoop of vanilla ice cream, or sandwich a scoop between two cookies for a quick ice cream sandwich. The buttery cookie and the cold cream are a perfect match.
Fresh berries add freshness and color to the plate. Berries cut the sweetness beautifully, and a few raspberries or strawberries next to the cookies make the dessert look elegant with no extra work. The tartness of the berries balances the rich Nutella, so guests can enjoy more than one cookie without the dessert feeling too heavy.
For a dessert table, pair these cookies with other holiday bakes. They sit happily next to our Easy Pioneer Woman Chocolate Chip Cookies for the Holidays and our Paula Deen Chocolate Gooey Butter Cookies Recipe, and the three together give guests a range of chocolate cookies. For a richer table, add our Easy Winter Cheesecake Recipes for Cozy Holiday Desserts alongside the cookies. Add a bowl of fresh berries and a pot of hot chocolate, and the table is done. For a full holiday menu, see our Easy Joanna Gaines Christmas Recipes for a Cozy Holiday and our 13 Must-Have Party Snack Recipes for the savory side of the party.
How to Store and Reheat Leftovers
Store cooled cookies in airtight boxes at room temperature for up to four days. Keep the boxes closed between servings, because air is what dries cookies out. Put a sheet of parchment paper between layers so the Nutella centers do not stick to the cookies above them. The cookies stay soft and chewy, and the Nutella stays smooth.
If the cookies feel a little firm after a day or two, warm them before serving. Ten seconds in the microwave brings back the soft texture and softens the Nutella slightly, so the cookie tastes almost fresh from the oven. Do not microwave for longer than that, or the Nutella can get too hot and the cookie can dry out. A warm oven works too: three minutes at 300 degrees Fahrenheit on a baking sheet is enough.
Freeze baked cookies for longer storage. Place them in a single layer on a tray and freeze until firm, then move them to a freezer bag with the air pressed out. Label the bag with the date. They keep for up to three months. Thaw at room temperature for about thirty minutes, and the Nutella softens again on its own. Frozen cookie dough also works: shape the dough into balls, freeze them solid, then press, fill, and bake straight from frozen, adding two extra minutes to the baking time.
Frequently Asked Questions
Can I use a different chocolate spread instead of Nutella?
Yes, you can use any chocolate-hazelnut spread you like, and the recipe works the same way. Use good-quality spread, because the center is the main flavor of the cookie. Peanut butter also works as a filling, and so does jam: fill half the batch with Nutella and half with raspberry jam for a cookie box with variety. Keep the filling amount the same, about a level teaspoon per cookie, so the cookies bake the same way.
How do I keep the Nutella from running out of the cookies?
Do not overfill the centers. A level teaspoon of Nutella in each well is enough, because the filling softens and spreads slightly as the cookie bakes. Press the well deep enough to hold the filling, with a base of dough underneath, and chill the dough briefly before shaping so the cookies hold their shape. A little Nutella on the edges is normal, but a full leak usually means the centers were overfilled.
Can I make the dough ahead of time?
Yes. Mix the dough, cover the bowl tightly, and refrigerate it overnight. You can also roll the dough into balls, press the centers, and refrigerate the tray for up to two days. Fill the centers with Nutella just before baking, so the filling stays glossy and fresh. Let the dough sit on the counter for about ten minutes before shaping so it softens enough to roll easily.
Why did my cookies spread flat in the oven?
The most common reason is dough that was too warm. Keep the dough chilled briefly before shaping, about fifteen minutes in the fridge, and bake the cookies in a fully preheated oven. Butter that was melted instead of soft can also cause spreading, so let the butter come to room temperature naturally. If your kitchen is warm, chill the shaped balls on the tray for ten minutes before they go into the oven.
Can I freeze Nutella thumbprint cookies?
Yes. Freeze the baked cookies in a single layer on a tray until firm, then move them to a freezer bag with the air pressed out. They keep for up to three months. Thaw at room temperature for about thirty minutes, and the Nutella softens again on its own. You can also freeze the unbaked dough balls and press, fill, and bake them straight from frozen with two extra minutes.
How long do Nutella thumbprint cookies stay fresh?
Stored in airtight boxes at room temperature, the cookies stay soft and fresh for up to four days. The Nutella center stays smooth, and the buttery dough keeps its chewy texture. Keep the boxes closed between servings and put parchment paper between layers so the centers do not stick. For longer storage, freeze the cookies for up to three months.
Final Thoughts
Nutella thumbprint cookies are the kind of recipe that earns a permanent place in your holiday baking. They are simple enough for a beginner, pretty enough for a gift box, and delicious enough that the tray empties within minutes. The ingredients are six pantry staples, the method is one bowl and twelve steps, and the result is a soft, buttery cookie with a rich chocolate-hazelnut center that everyone loves.
Bake a batch this week and see how fast they disappear. Pack some in a cookie box for a neighbor, save some for the dessert table, and keep a few warm for yourself with a mug of hot chocolate. For more seasonal baking, explore our Easy Winter Dessert Recipes and our Easy Winter Gingerbread Recipes for Cozy Holiday Baking. Happy baking, and happy holidays.