

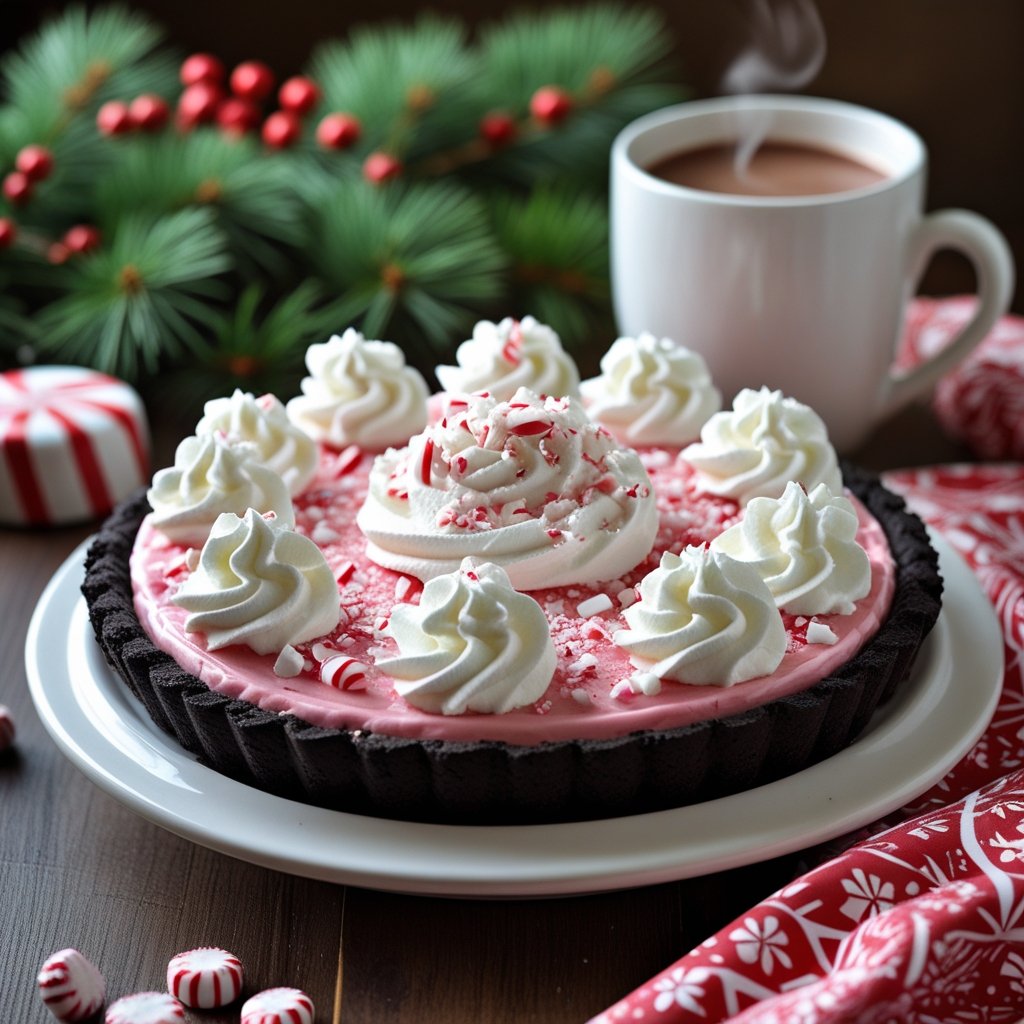
Cool, creamy, and full of Christmas cheer. That is what this Christmas peppermint pie tastes like. A crunchy chocolate crust holds a smooth peppermint filling, topped with crushed candy canes, and every slice tastes like the holidays. This guide covers the Christmas peppermint pie recipe in full depth, from the exact ingredients and the fourteen-step method to variations, what to serve with it, and how to store it for a busy holiday season.
If you want a Christmas dessert that looks festive without taking over your whole day, this pie is the answer. It needs almost no baking, just a short chill for the crust and a long chill for the filling, and most of that time is hands-off. The prep takes only twenty-six minutes, and the pie serves eight slices. Follow the steps below and you will get a cool, creamy pie with a crunchy crust and a pretty pink-tinted filling every single time.
For more Christmas dessert ideas, see our Easy Christmas Eve Dessert Recipes for a Sweet Holiday Night.
The full original recipe this guide is based on is the Christmas Peppermint Pie Recipe, with the same ingredients, times, and method used below.
Why Christmas Peppermint Pie Belongs on the Holiday Table
Christmas dinner is full of big, slow dishes that take hours, and that is exactly why peppermint pie earns its place. It is the dessert you can make a day ahead, the one that feeds eight people from a single pie dish, and the easy win that makes the whole table feel complete. One pie, one dish, and everyone serves themselves.
Peppermint pie is also practical holiday food. It is a wonderful make-ahead treat that saves time during the busiest season of the year. You do not need fancy tools, and it requires minimal baking, so the oven stays free for the turkey, the ham, and the side dishes. The pie chills in the fridge while you cook everything else, and it comes out cold, creamy, and ready to slice when dinner is done.
It fits the season in another way too. Peppermint is one of the most searched Christmas flavors, with candy canes, peppermint bark, and peppermint desserts climbing every December as the holiday approaches. This pie is the cool, refreshing answer to that same craving, and it balances the rich, heavy dishes on a Christmas table in a way that another chocolate cake never could. If your Christmas table already has a cake, peppermint pie is the light, minty partner that rounds out the dessert spread.
What Makes This Peppermint Pie So Good
The secret to this pie is simple, and it starts with the contrast. Cool peppermint filling, smooth and creamy, sits on a crunchy chocolate crust, and that contrast is what makes every bite interesting. The filling is light and airy, the crust is dark and crisp, and the crushed peppermint candies add little bursts of minty crunch in between. No single flavor shouts. They work together.
The second secret is the cream cheese. Use full-fat cream cheese for rich flavor. Full-fat cream cheese gives the filling its body and its tang, and it holds up in the fridge without turning watery. Low-fat cream cheese looks the same in the bowl, but it makes a softer, less stable filling that can weep after a day in the fridge. Buy the full-fat block, let it soften on the counter, and beat it until it is completely smooth before anything else goes in.
The third secret is patience at the end. Refrigerate the pie for at least four hours before serving. The filling needs that time to set properly, and a pie that is cut too early slides apart on the plate. The recipe itself was first tried at a grandmother’s holiday dinner, where the pie was cold, creamy, and perfectly minty, and that same cold, refreshing slice is what this pie brings to a home kitchen. Let it chill, let it set, and slice it cold for the best flavor.
Ingredients You Need for Christmas Peppermint Pie
Everything in this pie comes from an ordinary grocery list, and that is part of its charm. For the crust, you need two cups of chocolate cookie crumbs and six tablespoons of melted butter. For the filling, you need one cup of heavy whipping cream, eight ounces of cream cheese, softened, one cup of powdered sugar, half a teaspoon of peppermint extract, five drops of red food coloring, which is optional, one cup of crushed peppermint candies, and one tub of whipped topping, eight ounces. For garnish, you need crushed candy canes, chocolate shavings, and whipped cream.
Start with the cream cheese, because it decides the texture of the whole pie. Pick full-fat cream cheese in block form, not the whipped tub, and let it soften on the counter for about thirty minutes before you start. Softened cream cheese beats smooth without lumps, while cold cream cheese leaves little white bits in the filling that no amount of mixing fixes. The heavy whipping cream and the whipped topping work together to keep the filling light and airy, so use the amounts listed and do not swap in milk.
The peppermint extract is small in amount but big in effect. Half a teaspoon gives a clear, cool mint flavor without tasting like toothpaste. If you want a stronger flavor, add a little extra peppermint extract, but add it a few drops at a time and taste as you go, since peppermint extract is strong and a little goes a long way. The red food coloring is optional. Five drops give the filling a soft pink tint that looks festive on the plate, but the pie tastes exactly the same without it. For the crust, any plain chocolate sandwich cookie works. Crush them finely, so the crust presses together firmly instead of crumbling apart.
Equipment You Will Need
You do not need special equipment for this pie. A couple of mixing bowls hold the crust and the filling, and an electric mixer beats the cream cheese until it is smooth and creamy. A rubber spatula folds in the whipped topping gently, and measuring cups and spoons keep the sugar, extract, and candies exact, which matters in a no-bake pie where balance is everything.
You will also need a nine-inch pie dish, a saucepan if you melt the butter on the stove, a whisk, and a food processor for crushing the cookies into fine crumbs. If you do not have a food processor, put the cookies in a sealed bag and crush them with a rolling pin. A refrigerator does the real work in this recipe, chilling the crust and setting the filling. That is the whole list. Nothing fancy, nothing you do not already have in an ordinary kitchen, and that is one more reason this pie is such a reliable holiday choice.
How to Make Christmas Peppermint Pie: Step-by-Step Guide
Follow these fourteen steps in order, and the pie practically makes itself. The prep time is twenty-six minutes, the chilling time is four hours, the total time is four hours and twenty-six minutes, and the pie serves eight slices at about 340 calories each.
1. Crush the cookies finely. Crush the chocolate cookies finely in a food processor. The crumbs should look like fine sand, with no big pieces left. Fine crumbs press together into a firm crust, while coarse pieces leave gaps and make the crust crumble when you slice it. If you do not have a food processor, seal the cookies in a bag and crush them with a rolling pin until they are fine.
2. Mix the crumbs with melted butter. Put the two cups of cookie crumbs in a bowl and pour in the six tablespoons of melted butter. Mix until the crumbs are evenly moistened and the mixture looks like wet sand. Every crumb should be coated, since dry crumbs do not stick together and butter is the glue that holds the crust in place.
3. Press the mixture into the pie dish. Press the crumb mixture firmly into a nine-inch pie dish, covering the bottom and pushing it up the sides. Use the flat bottom of a measuring cup or a glass to press it down evenly. Press firmly. A loosely pressed crust falls apart when you slice the pie, while a firmly pressed crust holds its shape and cuts cleanly.
4. Chill the crust for twenty minutes. Put the pie dish in the fridge and chill the crust for twenty minutes. Chill the crust properly to avoid crumbling. The cold firms up the butter and locks the crumbs together, so the crust stays solid when the filling goes on top. Do not skip this step, even if you are in a hurry.
5. Beat the cream cheese until smooth. In a mixing bowl, beat the eight ounces of softened cream cheese with an electric mixer until it looks completely smooth and creamy. Scrape down the sides of the bowl once or twice so no lumps hide at the edges. This step decides the texture of the whole filling, so take your time and do not move on until the cream cheese is perfectly smooth.
6. Add the powdered sugar and peppermint extract. Add the one cup of powdered sugar and the half teaspoon of peppermint extract to the beaten cream cheese. Mix until everything blends well together and the mixture looks smooth and even. The powdered sugar sweetens the filling without graininess, and the peppermint extract brings the cool mint flavor that makes this pie taste like Christmas.
7. Fold in the whipped topping gently. Add the tub of whipped topping and fold it in gently with a rubber spatula. Use slow, wide strokes, lifting from the bottom of the bowl and folding over the top. Do not overmix the whipped topping. Overmixing knocks the air out of it, and the filling turns dense and heavy instead of light and fluffy. Stop as soon as the mixture looks uniform.
8. Add the crushed candies and food coloring. Add the one cup of crushed peppermint candies and the five drops of red food coloring, if you are using it. Mix lightly to keep the airy texture. The candies add minty crunch all through the filling, and the food coloring gives it a soft pink tint. Stir just enough to spread them evenly, then stop.
9. Pour the filling over the chilled crust. Take the chilled crust out of the fridge and pour the filling over it evenly. Use the spatula to guide the filling into the corners and up to the edges, so every slice has crust and filling in the right proportion.
10. Smooth the top. Smooth the top of the filling using a spatula for a neat finish. A smooth top looks better on the table, and it gives you a clean surface for the garnish. Take a few seconds here. A smooth top also helps the pie chill evenly.
11. Refrigerate for at least four hours. Put the pie back in the fridge and refrigerate it for at least four hours. This is the longest step, and it is the most important one. The filling needs those four hours to set properly, and a pie that is cut too early slides apart. Overnight is even better if you have the time, and the pie tastes just as good the next day.
12. Garnish with whipped cream and candy canes. Just before serving, garnish the pie with whipped cream, crushed candy canes, and chocolate shavings. Decorate just before serving for freshness, since the candy canes soften and bleed color if they sit on the filling for hours. A ring of whipped cream dollops around the edge and a sprinkle of crushed candy canes in the center looks festive and takes less than a minute.
13. Slice and serve chilled. Slice the pie with a sharp knife, wiping the blade clean between cuts for neat slices, and serve it chilled for the best flavor. A cold slice holds its shape, the filling stays creamy, and the crust stays crunchy. Let each slice sit on the plate for a minute or two before eating, so the flavors open up.
14. Enjoy and store the leftovers. Enjoy the pie with your family and guests, and store any leftovers covered in the fridge. Freeze leftovers for a quick festive treat later, wrapping individual slices well so they keep their shape and flavor.
The Secret to a Creamy, Cool Filling
Creaminess in this pie comes from three small habits. First, beat the cream cheese until it is completely smooth before anything else goes in. Lumps in the cream cheese become lumps in the finished pie, and no topping hides them. Second, fold the whipped topping in gently instead of beating it. Folding keeps the air in the filling, and that air is what makes the pie feel light instead of heavy. Third, and most important, chill the pie for the full four hours. The filling sets as it chills, and a pie that is cut too early is a pie that slides apart on the plate.
Temperature matters too. The crust chills for twenty minutes before the filling goes on, and the finished pie chills for at least four hours before it is sliced. Cold is part of the recipe, not an optional extra. A pie served at room temperature tastes soft and flat, while a pie served cold tastes refreshing and festive. If your fridge is crowded, clear a flat shelf before you start, so the pie chills evenly and nothing tips onto it.
For more chocolate holiday desserts, see our Easy Winter Chocolate Recipes for Cozy Holiday Desserts.
How to Tell When the Pie Is Ready to Serve
The hardest part of this pie is waiting, because the signs are subtle and the fridge hides the evidence. After at least four hours in the fridge, the filling should look set and hold its shape when you nudge the dish. Press the top lightly with your finger. It should feel firm and spring back, not leave a dent or feel soft in the center. That firmness is your sign.
If the center still feels soft or your finger leaves a dent, give it another hour and check again. If the filling looks set and the top feels firm, take it out and garnish it. A pie that is cut too early slides apart and looks messy on the plate, while a pie that has chilled long enough cuts into clean, neat slices. When in doubt, trust the waiting time more than the clock. Every fridge is a little different, and an overnight chill is the safest choice if you are serving the pie for Christmas dinner.
Easy Variations to Try
This pie is easy to make your own, and the recipe itself suggests a few simple changes. Add extra peppermint extract for stronger flavor, but add it a few drops at a time, since peppermint extract is strong. Add chocolate chips for added crunch, folding them into the filling with the crushed candies. They add little bursts of chocolate all through the filling and make the pie even more of a chocolate-lover’s dessert.
Beyond those, small swaps are safe as long as you keep the structure the same. Keep the eight ounces of cream cheese, the one cup of powdered sugar, and the tub of whipped topping, and the filling will set the way it should. Try a graham cracker crust instead of chocolate for a lighter, sweeter base, or a crushed gingersnap crust for a spicier holiday flavor. Swap the crushed peppermint candies for crushed candy canes in the filling, or use white chocolate shavings on top instead of dark. For a kid-friendly version, skip the food coloring and let the filling stay white, then decorate with colorful sprinkles. For a grown-up version, a drizzle of chocolate sauce over each slice adds richness without changing the pie itself.
Make-Ahead Tips for Christmas Day
Christmas day is busy enough without a dessert that needs attention at the last minute, and this pie is made for planning ahead. You can make it one day before and store it in the fridge, and making it early actually helps, because the extra chilling time lets the filling set perfectly and the flavors blend better. Make the pie the day before, let it chill for at least four hours, cover it loosely with plastic wrap or foil, and keep it in the fridge. On the day itself, all you have to do is garnish it just before serving and slice it.
If you want to get even further ahead, freeze the leftovers for a quick festive treat. Wrap individual slices tightly in plastic wrap and foil, and freeze them for up to a month. Thaw a slice in the fridge for a few hours before serving, and it tastes almost as good as fresh. For a full holiday plan, see our Easy Christmas Cake Recipes.
What to Serve With Christmas Peppermint Pie
This pie pairs well with many things, and it works as the cool, refreshing finish to a rich Christmas meal. The original recipe suggests three pairings, and each one works for a different moment. Hot chocolate is the classic choice. The creamy warmth of cocoa pairs beautifully with the minty coolness of the pie, and it enhances the whole Christmas experience. Coffee or espresso is the bold choice. A bold cup of coffee balances the pie’s sweetness, making each bite more satisfying, and it is perfect for dessert lovers who want something strong after a big meal. Vanilla ice cream is the indulgent choice. A scoop of soft vanilla ice cream adds another layer of creaminess and turns the pie into a true celebration dessert.
The pie also works well on a dessert table next to bigger holiday desserts. If you are building the rest of the table around it, our Easy Winter Dessert Recipes and our Easy Christmas Pie Recipes cover the rest of the spread. A hot cup of cocoa or coffee on the side makes it perfect after a big meal, and the pie is just as happy at a holiday party or a cookie exchange as it is on the Christmas table. For a warm drink to serve with it, see our Easy Holiday Hot Chocolate Recipes.
How to Store and Freeze Peppermint Pie
Store the pie in the fridge, covered with plastic wrap or foil, for up to four days. Covering matters, because the filling dries out and picks up smells from the fridge if it sits uncovered. If you have leftover slices, wrap them individually and they will keep just as well, ready to take out one at a time.
For longer storage, freeze the leftovers. Wrap individual slices tightly in plastic wrap and foil, place them in a freezer-safe container, and freeze for up to a month. Thaw a slice in the fridge for a few hours before serving, and it tastes almost as good as fresh. Do not garnish the pie before freezing, since the whipped cream and candy canes do not freeze well. Garnish fresh slices after they thaw instead.
One slice has about 340 calories, and the pie serves eight slices. That is the nutrition for a single slice, and it is part of what makes the pie feel rich without being overwhelming after a big Christmas meal.
Frequently Asked Questions
1. Can I make this pie ahead of time? Yes, you can make it one day before. Store it in the fridge, covered with plastic wrap or foil. This also helps the filling set perfectly and lets the flavors blend better, so a pie made the day before often tastes better than one made the same morning. Garnish it just before serving for the freshest look.
2. Do I have to use red food coloring? No, the food coloring is optional. Five drops give the filling a soft pink tint that looks festive, but the pie tastes exactly the same without it. If you skip it, the filling stays white, and the crushed peppermint candies still give it a festive look.
3. Why did my crust crumble when I sliced the pie? The most common reason is that the crust was not chilled long enough or not pressed firmly enough. Chill the crust for the full twenty minutes before adding the filling, and press the crumbs firmly into the dish with a flat-bottomed cup. Fine crumbs and firm pressing are what make a crust that cuts cleanly.
4. Can I use low-fat cream cheese instead? You can, but full-fat cream cheese gives a richer flavor and a firmer filling. Low-fat cream cheese makes a softer filling that can turn watery after a day in the fridge. For the best result, use full-fat cream cheese in block form and let it soften before beating.
5. How long does peppermint pie last in the fridge? The pie lasts up to four days in the fridge when it is covered with plastic wrap or foil. For longer storage, wrap individual slices and freeze them for up to a month, then thaw a slice in the fridge for a few hours before serving.
6. What can I serve with Christmas peppermint pie? Hot chocolate is the classic pairing, since the creamy warmth of cocoa goes beautifully with the minty coolness of the pie. Coffee or espresso balances the pie’s sweetness, and vanilla ice cream adds another layer of creaminess. All three turn a single slice into a full dessert moment.
Final Thoughts
This Christmas peppermint pie is simple, festive, and full of cheer. It brings cool mint and creamy chocolate to every bite, and it is the kind of dessert that turns a holiday meal into a memory. The crunchy chocolate crust, the smooth peppermint filling, and the crushed candy cane topping all work together, and the pie is easy enough to make on a busy Christmas without any stress.
Try it once, and it may become your favorite Christmas dessert too. Make it the day before, let it chill and set, and serve it cold with hot chocolate or coffee next to your Christmas dinner. If you try this recipe once, you will want it again, and now you know how to make Christmas peppermint pie at home easily. Enjoy every frosty bite.
For more Christmas baking, see our Easy Christmas Cookies to Bake This Holiday Season, and for the classic pairing, see our Easy Holiday Hot Chocolate Recipes.