

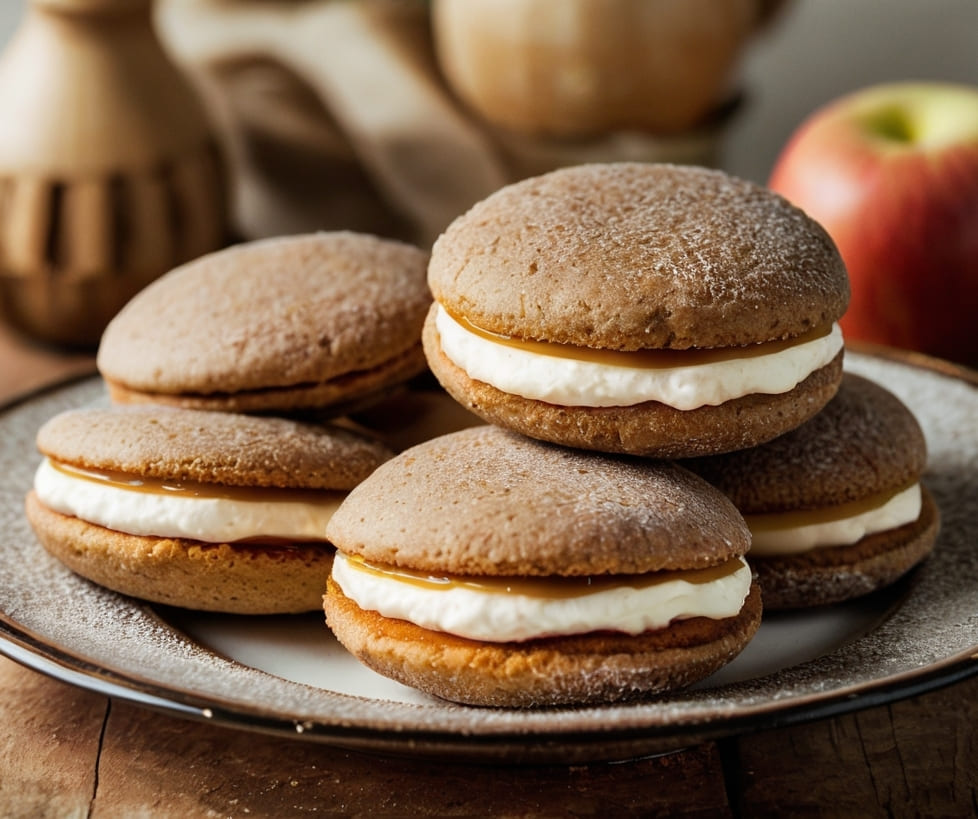
Soft, spiced, and full of fall flavor. That is what these apple cider whoopie pies taste like. Two tender cakes sandwich a creamy cider filling, and every bite carries apple cider, cinnamon, and brown sugar. This guide covers the apple cider whoopie pies recipe in full depth, from the exact ingredients and the twelve-step method to variations, what to serve with them, and how to store them for a busy holiday season.
If you want a fall dessert that looks bakery-quality without taking over your whole afternoon, these whoopie pies are the answer. The cakes bake in ten minutes, the filling takes minutes to whip together, and the whole recipe is done in about thirty minutes. They make ten pies, they travel well, and they taste even better the next day. Follow the steps below and you will get soft, evenly sized cakes with a smooth, sweet filling every single time.
For more fall apple desserts, see our Easy Winter Apple Dessert Recipes for Cozy Holiday Nights (https://recipeswalay.com/easy-winter-apple-dessert-recipes-for-cozy-holiday-nights/).
The full original recipe this guide is based on is the Apple Cider Whoopie Pies Recipe (https://recipeswalay.com/apple-cider-whoopie-pies-recipe/), with the same ingredients, times, and method used below.
Why Apple Cider Whoopie Pies Belong on the Fall Table
Fall baking is full of big pies and slow cakes that take hours, and that is exactly why whoopie pies earn their place. They are the dessert you can make in half an hour, the one that feeds ten people from a single batch, and the easy win that makes a gathering feel special without keeping you in the kitchen. One batch, ten little sandwiches, and everyone serves themselves.
Apple cider whoopie pies are also practical holiday food. Apple cider is everywhere in the fall, cinnamon and brown sugar are already in the pantry, and the recipe uses simple tools and common ingredients. The warm spice aroma makes them perfect for cozy gatherings, and they look bakery-quality on a plate even though a beginner can make them. They are easy to make ahead for easy serving, so you can bake them the day before a party and spend the day itself with your guests instead of at the oven.
They fit the season in another way too. Apple cider searches climb every fall as the weather turns cool, and apple desserts are one of the most searched fall baking topics, with apple pie, apple cake, and spiced apple treats leading the November lists. Whoopie pies are the hand-held answer to that same craving. They carry the flavors of a fall festival in a small, shareable package, and they sit happily next to bigger desserts like pie and cake on a holiday table. If your fall table already has a pie, whoopie pies are the fun, grab-and-go partner that rounds out the dessert spread.
What Makes These Whoopie Pies So Good
The secret to these whoopie pies is simple, and it starts with the cider. Use fresh apple cider for richer flavor. Real apple cider, not apple juice and not cider vinegar, gives the cakes their warm, fruity depth. The half cup of cider in the batter and the two tablespoons in the filling carry the apple flavor all the way through, so every bite tastes like fall instead of just tasting sweet.
The second secret is the spice balance. One teaspoon of cinnamon, half a teaspoon of nutmeg, and half a teaspoon of ginger give the cakes a warm, cozy flavor without tasting like a spice cake. The spices sit next to one cup of packed brown sugar, which adds a deep, caramel-like sweetness that white sugar never quite matches. The half cup of applesauce keeps the cakes soft and moist, and it adds a little more apple flavor at the same time.
The third secret is patience at the end. Let the cakes cool completely before you fill them. Warm cakes melt the filling and slide apart, while fully cooled cakes hold their shape and sandwich neatly. That one habit is the difference between tidy, bakery-looking whoopie pies and a soft, sliding mess. The recipe itself was first discovered at a fall festival, where the mix of apple cider and spices felt magical, and that same festival feeling is what these pies bring to a home kitchen.
Ingredients You Need for Apple Cider Whoopie Pies
Everything in these whoopie pies comes from an ordinary grocery list, and that is part of their charm. For the cakes, you need two and a half cups of all-purpose flour, one teaspoon of baking powder, half a teaspoon of baking soda, one teaspoon of ground cinnamon, half a teaspoon of ground nutmeg, half a teaspoon of ground ginger, and half a teaspoon of salt. You need one cup of brown sugar, packed, half a cup of unsalted butter, softened, half a cup of apple cider, one large egg, one teaspoon of vanilla extract, and half a cup of applesauce.
For the filling, you need half a cup of unsalted butter, softened, one and a half cups of powdered sugar, two tablespoons of apple cider, and half a teaspoon of cinnamon. That is the whole list. Nothing fancy, nothing hard to find, and most of it is probably in your kitchen already.
Start with the cider, because it decides the flavor of the whole recipe. Pick fresh apple cider if you can, since it gives a richer, deeper apple flavor than shelf-stable juice. The cider goes into both the cakes and the filling, so its quality shows up in every bite. If you only have apple juice, the pies will still work, but they will taste milder and less like fall.
The butter should be softened, not melted, for both the cakes and the filling. Soft butter creams smoothly with the brown sugar and whips into a light filling, while melted butter makes the batter greasy and the filling runny. Leave the butter on the counter for about thirty minutes before you start. The brown sugar should be packed firmly into the measuring cup, since that is how the recipe measures its sweetness. Use a large egg at room temperature if you can, since cold eggs mix less evenly. The applesauce should be plain and unsweetened if possible, so it adds moisture and apple flavor without extra sweetness. For the filling, sift the powdered sugar if it looks lumpy, so the finished filling turns out smooth instead of grainy.
Equipment You Will Need
You do not need special equipment for these whoopie pies. A couple of mixing bowls hold the dry and wet ingredients, and an electric mixer creams the butter and sugar and beats the filling until it turns creamy. A whisk blends the dry ingredients, and measuring cups and spoons keep the flour, spices, and cider exact, which matters in a cake where balance is everything.
You will also need baking sheets lined with parchment paper, a cooling rack for the cakes, a rubber spatula for folding and spreading, and a small saucepan if you want to warm the cider. That is the whole list. Nothing fancy, nothing you do not already have in an ordinary kitchen, and that is one more reason these whoopie pies are such a reliable fall choice. A cookie scoop or a tablespoon helps you drop even portions of batter, which gives you evenly sized cakes that match up neatly into sandwiches.
How to Make Apple Cider Whoopie Pies: Step-by-Step Guide
Follow these twelve steps in order, and the whoopie pies practically make themselves. The total time is thirty minutes, with twenty minutes of prep and ten minutes of cooking, and the recipe makes ten pies at about 280 calories each.
- Preheat the oven and prepare the pans. Preheat the oven to 350 degrees Fahrenheit. Line your baking sheets with parchment paper. This step takes a minute, but it matters. Parchment keeps the soft cakes from sticking, and it makes cleanup easy. While the oven heats, set out your ingredients so everything is within reach once you start mixing.
- Whisk the dry ingredients. In a mixing bowl, whisk together the flour, baking powder, baking soda, cinnamon, nutmeg, ginger, and salt. Whisking spreads the leavening and the spices evenly through the flour, so every cake rises the same way and tastes the same. Take a few extra seconds here. Lumps of baking soda or pockets of spice are the most common reason one cake tastes different from the rest.
- Cream the butter and brown sugar. In a second bowl, cream the half cup of softened butter with the one cup of packed brown sugar until the mixture looks light and fluffy. Use an electric mixer for this step, and let it run for two to three minutes. Creaming beats tiny air bubbles into the butter and sugar, and those bubbles are what make the cakes soft and tender instead of dense and flat. Scrape down the sides of the bowl once or twice so everything mixes evenly.
- Beat in the egg, vanilla, cider, and applesauce. Add the large egg, the teaspoon of vanilla extract, the half cup of apple cider, and the half cup of applesauce to the creamed butter and sugar. Beat until everything is combined and the mixture looks smooth. The egg binds the batter, the vanilla rounds out the flavor, the cider brings the apple taste, and the applesauce adds moisture that keeps the cakes soft for days.
- Add the dry ingredients to the wet mixture. Gradually add the whisked dry ingredients to the wet mixture, mixing on low speed or stirring by hand. Mix until just combined and you cannot see streaks of flour anymore. Then stop. Do not overmix the batter. Overmixing develops the gluten in the flour and turns soft cakes into tough, chewy ones, and this is the single most important warning in the whole recipe.
- Drop the batter onto the prepared sheets. Drop the batter by tablespoons onto the parchment-lined baking sheets, leaving about two inches between each mound. The cakes spread a little as they bake, so space matters. Try to make the mounds as even as you can, since evenly sized cakes pair up into neat sandwiches. A small cookie scoop makes this step fast and consistent.
- Bake for ten minutes. Place the sheets in the preheated oven and bake for ten minutes, or until the cakes look set. Ten minutes is quick, so stay nearby and do not walk away. The cakes are done when the tops look dry and spring back lightly when you touch them. Do not wait for them to brown deeply. These are soft cakes, and they should stay pale and tender.
- Cool completely on a wire rack. Move the baked cakes to a wire rack and let them cool completely. This step is not optional. Warm cakes melt the filling, slide apart, and turn into a mess. Let them cool all the way to room temperature, which takes about fifteen to twenty minutes. Use the time to make the filling.
- Beat the filling until creamy. In a clean bowl, beat the half cup of softened butter with the one and a half cups of powdered sugar, the two tablespoons of apple cider, and the half teaspoon of cinnamon. Beat until the filling looks smooth and creamy. If the filling feels too soft, chill it in the fridge for a few minutes until it firms up enough to spread. The filling should hold its shape on a spoon but still spread easily.
- Spread the filling on one cake. Take one cooled cake and spread a generous layer of filling on its flat side. Use a small spatula or a butter knife, and spread the filling almost to the edges so every bite has some. Do not overload it. A thick layer looks generous, but too much filling squeezes out the sides when you press the sandwich together.
- Top with another cake to make a sandwich. Place a second cake on top of the filling, flat side down, and press gently until the filling reaches the edges. Match cakes of similar size so the sandwich looks neat. Repeat for the remaining cakes until you have ten finished whoopie pies.
- Repeat and serve. Repeat the filling and sandwiching for the rest of the cakes. Serve the whoopie pies right away, or store them in an airtight container. They taste even better the next day, after the flavors have had time to blend and the cakes have softened a little more around the filling.
The Secret to Soft, Bakery-Quality Cakes
Softness in these whoopie pies comes from three small habits. First, do not overmix the batter. Mix until the flour just disappears, then stop. Overmixing is the fastest way to turn a soft cake into a tough one, and no amount of filling fixes a chewy cake. Second, measure the flour correctly. Spoon the flour into the measuring cup and level it off, instead of scooping straight from the bag, which packs in too much flour and dries the cakes out. Third, bake for ten minutes and no longer. These cakes are meant to be pale and soft, and an extra two minutes in the oven is the difference between a tender cake and a dry one.
The applesauce deserves some credit too. Half a cup of applesauce keeps the cakes moist for days, which is why these whoopie pies still taste fresh the next morning. The cider adds flavor, but the applesauce adds the staying power. Together with the creamed butter and brown sugar, they give you a cake that is soft when it comes out of the oven and still soft when you eat it the next day.
For more apple baking ideas, see our Easy Apple Pie Cake for the Holidays (https://recipeswalay.com/easy-apple-pie-cake-for-the-holidays/).
How to Tell When the Cakes Are Done
The hardest part of this recipe is knowing when to take the cakes out, because ten minutes goes fast and the signs are subtle. After ten minutes at 350 degrees Fahrenheit, the tops should look dry and set, with no wet or shiny spots in the center. Touch one lightly with your finger. It should spring back instead of leaving a dent. That spring is your sign.
If the tops still look wet or your finger leaves a dent, give them one more minute and check again. If the edges look set and the tops spring back, take them out, even if they look pale. Pale is correct for these cakes. Waiting for a golden-brown color overbakes them, and overbaked cakes turn dry and crumbly instead of soft and tender. When in doubt, trust the spring-back test more than the color. Every oven is a little different, and the cooling time on the rack finishes the job.
Easy Variations to Try
These whoopie pies are easy to make your own, and small changes are safe as long as you keep the structure the same. Keep the two and a half cups of flour, the one egg, and the half cup of cider, and the cakes will bake the way they should. Change the flavors around them, and you still get the same soft whoopie pies with your own touch.
Try a caramel drizzle on top. Warm caramel sauce over the finished pies adds extra sweetness and makes them look like something from a bakery case. A cream cheese filling is another good swap. Replace the butter filling with a cream cheese version for a tangier, richer center that pairs beautifully with the spiced cakes. Add a pinch of extra ginger or a little clove to the spice mix if you like your fall desserts with more warmth. Chopped pecans or walnuts folded into the batter add crunch, and a dusting of powdered sugar on top gives the finished pies a snowy, festive look.
For a holiday version, add a little orange zest to the filling, or roll the edges of the finished pies in crushed gingersnap crumbs. For a kid-friendly version, skip the extra spice and add mini chocolate chips to the batter. The recipe is forgiving, so try one change at a time and keep notes on what your family likes best.
Make-Ahead Tips for Fall Baking
Fall baking days are busy enough without a dessert that needs the oven at the last minute, and these whoopie pies are made for planning ahead. You can make them ahead for easy serving, and making them early actually helps, because the extra time lets the flavors blend better. Bake the cakes the day before, let them cool completely, and store them unfilled in an airtight container. Make the filling the same day and keep it covered in the fridge, then assemble the sandwiches an hour or two before serving.
If you want to get even further ahead, the finished whoopie pies are freezer-friendly. Wrap them individually in plastic wrap, place them in a freezer bag or container, and freeze them for up to a few weeks. Thaw them in the fridge overnight or on the counter for an hour before serving, and they taste almost as good as fresh. For a full holiday plan, see our Easy Thanksgiving Dinner Recipes (https://recipeswalay.com/easy-thanksgiving-dinner-recipes/).
What to Serve With Apple Cider Whoopie Pies
These whoopie pies pair well with many things, and they work as the sweet finish to a fall meal or as a snack on their own. The original recipe suggests three pairings, and each one works for a different moment. Warm caramel sauce drizzled over the pies adds extra sweetness and turns a simple treat into a dessert plate. Spiced apple tea balances the richness with a light, warm flavor, and it is the perfect drink for an afternoon gathering. Vanilla ice cream creates a decadent dessert plate, with the cold creaminess playing against the warm spices in the cakes.
They also work well on a dessert table next to bigger holiday desserts. If you are building the rest of the table around them, our Easy Thanksgiving Desserts for a Crowd (https://recipeswalay.com/easy-thanksgiving-desserts-for-a-crowd/) and our Easy Christmas Cookies to Bake This Holiday Season (https://recipeswalay.com/easy-christmas-cookies-to-bake-this-holiday-season/) cover the rest of the spread. A hot cup of coffee or spiced cider on the side makes them perfect after a big meal, and they are just as happy at a potluck, a school bake sale, or a birthday party as they are on the Thanksgiving table.
How to Store and Freeze Whoopie Pies
Store the whoopie pies in an airtight container at room temperature for two to three days, or in the fridge for up to a week. The airtight container matters, because the cakes dry out quickly if they sit uncovered. If you stack them, place a sheet of parchment paper between the layers so the filling does not stick to the cake above it.
For longer storage, freeze them. Wrap each pie individually in plastic wrap, place them in a freezer-safe bag or container, and freeze for up to two months. Thaw in the fridge overnight, or on the counter for about an hour, before serving. The recipe notes that the pies taste even better the next day, and that holds true after freezing too. The flavors blend, the cakes soften a little more, and the filling settles into the cakes.
One pie has about 280 calories, and the recipe makes ten pies. That is the nutrition for a single whoopie pie, and it is part of what makes them feel like a proper treat without being overwhelming after a big fall meal.
Frequently Asked Questions
- Can I use apple juice instead of apple cider? You can, but fresh apple cider gives a richer flavor. Apple juice is milder and sweeter, so the pies will taste less like fall. If you use juice, pick one that is not from concentrate if you can, and keep the same amount, half a cup in the cakes and two tablespoons in the filling.
- Why did my cakes turn out tough instead of soft? The most common reason is overmixing the batter. Mix until the flour just disappears, then stop. Overmixing develops the gluten in the flour and makes the cakes chewy. The second most common reason is overbaking, so check the cakes at ten minutes and take them out as soon as the tops spring back.
- Can I make these whoopie pies ahead of time? Yes, you can make them ahead for easy serving. Bake the cakes a day early and store them unfilled in an airtight container, keep the filling covered in the fridge, and assemble the sandwiches a few hours before serving. The finished pies are also freezer-friendly, so you can freeze them for up to two months.
- How do I keep the filling from sliding out? Let the cakes cool completely before you fill them, since warm cakes melt the filling. Chill the filling if it feels too soft, and do not overload the cakes. A moderate layer spread almost to the edges gives you filling in every bite without squeezing out the sides.
- What can I serve with apple cider whoopie pies? Warm caramel sauce drizzled over the pies adds extra sweetness. Spiced apple tea balances the richness with a light flavor. Vanilla ice cream creates a decadent dessert plate. A hot cup of coffee or spiced cider also works well after a big fall meal.
- How long do apple cider whoopie pies last? They keep for two to three days at room temperature in an airtight container, and up to a week in the fridge. For longer storage, wrap them individually and freeze them for up to two months, then thaw in the fridge overnight before serving. They taste even better the next day, after the flavors have blended.
Final Thoughts
These apple cider whoopie pies are simple, cozy, and full of fall flavor. They bring warmth to every bite, and they are the kind of dessert that turns an ordinary autumn afternoon into a memory. The fresh apple cider, the warm spices, and the creamy filling all work together, and the pies are easy enough to make on a busy day without any stress.
Try them once, and they may become your favorite fall dessert too. Bake them the day before, let them cool and fill them, and serve them with warm caramel sauce or vanilla ice cream next to a cup of spiced apple tea. If you try this recipe once, you will want it again, and now you know how to make apple cider whoopie pies at home easily. Enjoy every bite.
For a warm drink to serve with the pies, see our Easy Holiday Drink Recipes (https://recipeswalay.com/easy-holiday-drink-recipes/), and for more fall baking, see our Easy Cinnamon Rolls for Christmas Morning (https://recipeswalay.com/easy-cinnamon-rolls-for-christmas-morning/).