

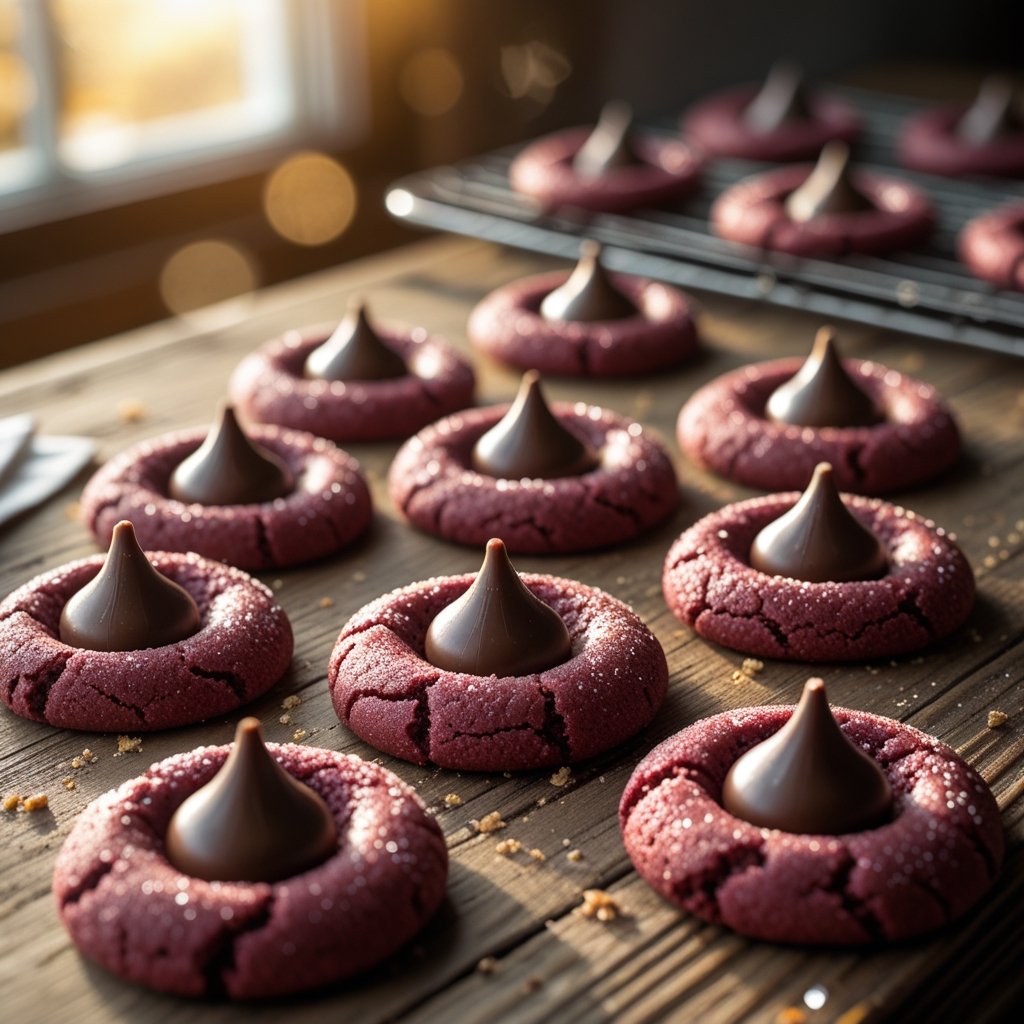
Soft, chocolatey, and dressed in festive red. That is what red velvet blossoms cookies taste like. A tender cocoa cookie with the gentle tang and deep red color of classic red velvet, rolled in sugar, and crowned with a creamy Hershey’s Kiss the moment it leaves the oven. This guide covers the red velvet blossoms cookies recipe in full depth, from the exact ingredients and the twelve-step method to variations, what to serve with them, and how to store the leftovers for a busy holiday week.
If you want a holiday cookie that looks like Christmas on a plate, these cookies are the answer. They take the beloved flavor of red velvet cake and turn it into a simple cookie you can bake in one bowl, with no frosting, no layering, and no special tools. The dough comes together in minutes, the cookies bake in nine to eleven minutes, and the whole batch is ready in about twenty-five minutes. Follow the steps below and you will get soft, chewy red cookies with a melted chocolate Kiss in the center every single time.
For more holiday baking for cold nights, see our Easy Winter Cookie Recipes for Cozy Holiday Baking.
The full original recipe this guide is based on is the Hershey’s Red Velvet Blossoms Cookies Recipe, with the same ingredients, times, and method used below.
Why Red Velvet Blossoms Cookies Belong on the Holiday Table
The holidays ask a lot of the cook. There are big meals to plan, guests to feed, and a table that needs to look generous without keeping you in the kitchen all day. Red velvet blossoms cookies fit that moment perfectly. They are quick to make, they feed a crowd from a single batch of about two dozen, and they taste like something you spent hours on. A tray of these cookies looks festive on a dessert table, and they disappear faster than almost anything else you bake.
They also solve the most common problem with holiday baking: time. Between the main meal, the side dishes, and the guests arriving, nobody has hours to spend on dessert. These cookies need one bowl, one baking sheet, and about fifteen minutes of prep work. The dough chills for twenty minutes while you do something else, and the cookies bake in nine to eleven minutes. You can bake them in the morning and serve them at dinner, or bake them the day before and store them in an airtight jar.
Red velvet blossoms cookies also suit every taste at the table. Kids love the bright red color and the chocolate Kiss on top. Adults love the soft cocoa flavor and the tender, chewy texture. They work for a Christmas dessert table, a holiday cookie box, a school party, or a quiet evening with a mug of hot chocolate. Bake a double batch and you will have enough for the party and a few left over for yourself.
There is something else that makes these cookies special: they look like the holidays before anyone takes a bite. The deep red color, the sparkle of sugar on the edges, and the chocolate Kiss in the center make them the prettiest cookie on the tray. Guests reach for them first, and they photograph beautifully for a cookie swap or a gift box. That is the kind of baking memory people carry with them, and it is why red velvet blossoms cookies belong on every holiday table.
What Makes These Red Velvet Blossoms Cookies So Good
The first thing is the red velvet flavor. Two tablespoons of unsweetened cocoa powder give the cookies their gentle chocolate taste without making them taste like a plain chocolate cookie. The cocoa is the heart of red velvet: it adds depth and a soft, almost velvety crumb. The cookies taste rich and chocolatey, but the flavor stays light enough that you can eat two or three without feeling overwhelmed.
The second is the color. One teaspoon of red food coloring turns the dough a bright, festive red that makes these cookies instantly recognizable. The color is not just for show: it is the signature of red velvet, and it is what makes the cookies feel special on a holiday table. Gel food coloring gives an even deeper red if you want a bolder look, and a single teaspoon of liquid coloring still gives a lovely, warm red.
The third is the Hershey’s Kiss. Each cookie gets one unwrapped Kiss pressed into the center the moment it comes out of the oven, so the chocolate softens just enough to hold its shape while melting slightly into the cookie. The Kiss adds a creamy milk-chocolate center that contrasts with the soft cocoa cookie around it. It also makes the cookies look finished and professional, like something from a bakery.
The fourth is the sugar roll. Each ball of dough is coated in granulated sugar before baking, which gives the finished cookies a delicate sparkle and a lightly crisp edge. The sugar also helps the cookies hold their round shape in the oven. Combined with the butter-rich dough and the short bake time, it is what keeps the centers soft and chewy while the edges turn lightly golden.
Ingredients You Need for Red Velvet Blossoms Cookies
This recipe uses simple pantry ingredients, red food coloring, and a bag of Hershey’s Kisses. Measure everything before you start so the dough comes together quickly and the butter stays at the right temperature. The recipe makes about 24 cookies, and each cookie has about 130 calories.
For the dough, you need one and a half cups of all-purpose flour, two tablespoons of unsweetened cocoa powder, one teaspoon of baking soda, and a quarter teaspoon of salt. The baking soda gives the cookies a gentle lift, the salt sharpens the cocoa flavor, and the cocoa brings the chocolate heart of red velvet. Whisk the dry ingredients together in a small bowl before you add them to the wet mixture, so the cocoa and baking soda spread evenly through the dough.
For the wet mixture, you need half a cup of unsalted butter, softened, three quarters of a cup of granulated sugar, a quarter cup of brown sugar, one large egg, one teaspoon of vanilla extract, and one tablespoon of milk. The butter must be soft but not melted: it should dent easily when you press it with a finger, and it should hold its shape. Soft butter creams properly with the sugars, while melted butter makes the dough greasy and the cookies flat. Take the butter out of the fridge about thirty minutes before you start baking.
For the color and the finish, you need one teaspoon of red food coloring and twenty-four to thirty Hershey’s Kisses, unwrapped, plus a quarter cup of sugar for rolling. Unwrap the Kisses before you start baking, because the cookies need their Kiss the moment they leave the oven and there is no time to unwrap chocolates with hot cookies waiting. If you want a deeper red, use gel food coloring instead of liquid coloring, keeping the amount about the same.
Equipment You Will Need
You do not need any special equipment for these cookies. A large mixing bowl holds the dough, and an electric hand mixer makes creaming the butter and sugars quick and easy, though a wooden spoon and a little elbow grease work too. Measuring cups and spoons keep the ingredients accurate. A baking sheet lined with parchment paper keeps the cookies from sticking and makes cleanup simple. A cooling rack lets the cookies cool evenly so the bottoms stay crisp instead of steaming soft. A spatula helps you move the warm cookies without breaking them, and a small bowl holds the sugar for rolling. That is everything: one bowl, one tray, and a bag of Kisses.
How to Make Red Velvet Blossoms Cookies
Follow these twelve steps in order and the cookies will turn out soft, chewy, and bright red every time.
- Preheat your oven to 350 degrees Fahrenheit (175 degrees Celsius) and line your baking sheets with parchment paper. Unwrap all twenty-four to thirty Hershey’s Kisses now and set them in a small bowl by the oven, because you will need them the second the cookies come out.
- Mix the dry ingredients. In a bowl, combine the flour, cocoa powder, baking soda, and salt. Whisk them together until the cocoa is evenly distributed and there are no pockets of baking soda or lumps of cocoa.
- Cream the butter and sugars. In a large bowl, beat the softened butter, granulated sugar, and brown sugar together with an electric mixer until the mixture is light and fluffy. This usually takes about two minutes. Creaming traps air in the dough, which keeps the cookies soft.
- Add the egg, vanilla, milk, and food coloring. Beat in the large egg, the vanilla extract, the tablespoon of milk, and the teaspoon of red food coloring, continuing to beat until the mixture is smooth and evenly red. The color should be bright and uniform before you add the flour.
- Combine the wet and dry ingredients. Gradually add the dry ingredients to the wet mixture, mixing on low speed until the dough forms. Stop as soon as the flour disappears. Do not overmix the dough, or the cookies will turn out tough instead of tender.
- Chill the dough. Refrigerate the cookie dough for twenty minutes before baking. Chilling firms up the butter, which stops the cookies from spreading too thin in the oven and helps them bake thick and soft with a perfect round shape.
- Roll the dough into balls. Scoop the chilled dough and roll it between your palms into small, even balls. Even sizing matters: balls that are the same size bake at the same speed, so every cookie finishes at the same time.
- Coat each ball in sugar. Roll each dough ball in the quarter cup of sugar until it is lightly coated all over. The sugar gives the finished cookies their sparkle and a lightly crisp edge.
- Place the balls on the baking sheet. Set the sugar-coated balls on the prepared baking sheet, spacing them about two inches apart so the cookies have room to spread slightly as they bake.
- Bake for nine to eleven minutes. The cookies should look set around the edges while the centers still look slightly soft. Pull them out when the edges look firm even if the centers still look slightly soft, because the cookies keep cooking on the hot tray.
- Press a Hershey’s Kiss on top immediately. The moment the tray leaves the oven, press one unwrapped Hershey’s Kiss gently into the center of each cookie. The heat softens the chocolate just enough to hold it in place. Work quickly, while the cookies are still hot.
- Cool on a rack completely before serving. Let the cookies rest on the baking sheet for a few minutes, then move them to a wire rack with a spatula and let them cool completely. Cooling on a rack keeps air moving under the cookies so the bottoms stay lightly crisp instead of turning soggy, and it lets the chocolate Kiss set.
The Secret to Soft, Chewy Red Velvet Blossoms Cookies
The first secret is the chill. Twenty minutes in the fridge is the minimum, and it makes the biggest difference of any single step. Cold dough spreads slowly in the oven, so the cookies bake up thick and soft instead of thin and crisp. If your kitchen is warm, chill the dough for thirty minutes. If you skip the chill, the cookies will still taste good, but they will spread wider and bake thinner, and the Kisses will sit less neatly on top.
The second secret is gentle mixing. Once the flour goes in, mix only until it disappears. Every extra stir develops more gluten, and more gluten means tougher cookies. The same rule applies when you roll the dough into balls: a few gentle rolls are enough. The dough should look a little rough and uneven when you stop, and that is exactly right.
The third secret is the bake time. Nine to eleven minutes is a short window, and the exact time depends on your oven. The edges should look set while the centers still look slightly soft. The cookies firm up as they cool on the hot tray, so if you wait until they look fully done in the oven, they will be overbaked by the time they cool. Watch the clock closely, because overbaking is the fastest way to dry cookies, and dry red velvet loses the soft, velvety texture that makes it special.
The fourth secret is pressing the Kiss at the right moment. The Kiss must go on immediately, while the cookie is hot enough to soften the chocolate slightly. If you wait until the cookies cool, the Kiss will not stick and will fall off when you pick the cookie up. Have the Kisses unwrapped and waiting before the tray goes into the oven, and press each one gently into the center without pushing it all the way through.
Variations to Try
White chocolate Kisses are the easiest swap for a different look. Use white chocolate or cookies-and-cream Kisses instead of milk chocolate for a snowy center that stands out against the red cookie. The flavor turns sweeter and creamier, and the white-on-red contrast looks beautiful in a gift box.
Peppermint Kisses turn these into a Christmas-only cookie. Candy cane Kisses add a cool mint note that pairs beautifully with cocoa, and the red-and-white stripes echo the holiday theme. This version is a favorite for cookie swaps because it tastes like the season.
Add a pinch of cinnamon to the dry ingredients for a warmer, deeper flavor. A quarter teaspoon is enough: the extra spice should warm the background of the cookie, not take over from the cocoa. This version is especially good with a mug of spiced hot chocolate on a cold evening.
Chocolate drizzle dresses the cookies up for a party. After the cookies have cooled completely, drizzle melted white chocolate over the tops in thin lines. The white drizzle against the red cookie looks festive, and the extra chocolate makes the cookies taste even richer. Let the drizzle set for a few minutes before stacking or packing the cookies.
Make them gluten-free with a one-to-one gluten-free flour blend. Swap the all-purpose flour cup for cup with a blend that contains xanthan gum, and keep everything else the same. The cookies bake a little more delicately, so handle them gently when you move them to the cooling rack.
How to Tell When the Cookies Are Done
The most reliable test is the edge test. Look at the edges of the cookies: they should look set and matte, while the centers still look slightly soft and a little puffy. If the edges are dark brown, the cookies are overbaked. If the whole cookie still looks wet and shiny, give it one more minute and check again.
The second test is the touch test. Press the center of a cookie very gently with a fingertip, away from where the Kiss will go. It should feel soft and spring back slowly, not feel wet or sticky. If your finger leaves a deep dent, the cookie needs another minute. If the cookie feels firm all the way through, it is probably already overbaked, so take the tray out right away.
The third test is time and smell. Nine to eleven minutes at 350 degrees Fahrenheit is the window for this recipe, and most ovens land near ten minutes. When the kitchen starts to smell like warm cocoa, the cookies are close. Trust the clock and the edges together: set a timer for nine minutes, check the edges, and add one minute at a time until they look right.
Make-Ahead Tips for Busy Holiday Days
The dough can be made a day ahead and kept in the fridge. Mix the dough, cover the bowl tightly with plastic wrap, and refrigerate it overnight. Let it sit on the counter for ten minutes before rolling so it softens just enough to portion easily, then roll, coat in sugar, and bake as usual. The cookies taste just as good as fresh-mixed dough, and the extra chill makes them even thicker.
You can also roll the dough into balls ahead of time. Portion the dough into balls, coat them in sugar, and arrange them on a parchment-lined tray, covered tightly, in the fridge for up to two days. Bake the balls straight from the fridge, adding one extra minute to the baking time. This is the best option for a party day, because you can bake a fresh tray while guests are arriving and press the Kisses on while the cookies are still warm.
Baked cookies keep well too. Let them cool completely, then store them in an airtight jar at room temperature for several days. The Kisses stay set and the cookies stay soft, so they taste almost as good on day three as they did on day one. Put a sheet of parchment paper between layers so the Kisses do not stick to the cookie above them.
For longer storage, freeze the baked cookies. Place them in a single layer on a tray and freeze until firm, then move them to a freezer bag with the air pressed out. They keep for up to three months. Thaw at room temperature for about thirty minutes before serving. You can also freeze the unbaked dough balls and bake them straight from frozen with two extra minutes, pressing the Kisses on as usual.
What to Serve With Red Velvet Blossoms Cookies
A steaming mug of hot chocolate is the classic pairing. A creamy mug enhances the cocoa flavor of the cookies and adds a warm, rich note that makes the whole dessert feel like a holiday treat. Add a few marshmallows and the pairing feels like a celebration. Coffee works just as well: the slight bitterness of a warm brew balances the sweet Kiss, and the two together taste like a cozy cafe on a winter afternoon.
Vanilla ice cream is another natural match, especially for kids. The cold sweetness balances the cookie’s rich red velvet taste, and a warm cookie with a scoop of ice cream turns a simple bake into a full dessert. Fresh strawberries work beautifully too: their natural tang complements the Hershey’s chocolate center perfectly, and the red-on-red plate looks stunning on a dessert table.
For a dessert table, pair these cookies with other holiday bakes. They sit happily next to our Easy Winter Dessert Recipes and our 12 Best Holiday Dessert Recipes, and the three together give guests a range of flavors. Add our Easy Pioneer Woman Chocolate Chip Cookies for the Holidays for a classic cookie that everyone recognizes.
For a Christmas cookie box, these cookies are one of the best choices because they hold up well in transit and their red color pops against lighter cookies. Pack them with our Easy Caramel Apple Cookies for the Holidays and our Easy Nutella Thumbprint Cookies for the Holidays for a box that covers spice, fruit, chocolate, and cream. For a full holiday menu, see our Easy Winter Gingerbread Recipes for Cozy Holiday Baking and our Easy Winter Cheesecake Recipes for Cozy Holiday Desserts.
How to Store and Reheat Leftovers
Store cooled cookies in an airtight jar at room temperature for several days. Keep the container closed between servings, because air is what dries cookies out. A slice of bread tucked into the container can help keep the cookies soft: the bread dries out first and the cookies stay moist. Replace the bread slice every day or two.
If the cookies feel a little firm after a day or two, warm them before serving. Ten seconds in the microwave brings back the soft texture and softens the Kiss slightly, so the cookie tastes almost fresh from the oven. Do not microwave for longer than that, or the chocolate can get too hot and the cookie can dry out. A warm oven works too: three minutes at 300 degrees Fahrenheit on a baking sheet is enough.
Freeze baked cookies for longer storage. Flash-freeze them in a single layer on a tray, then pack them in a freezer bag with the air pressed out. Label the bag with the date. They keep for up to three months. Thaw at room temperature for about thirty minutes, and warm them briefly if you want the Kiss soft again. Frozen cookie dough also works: roll the dough into balls, freeze them solid, then bake straight from frozen, adding two extra minutes to the baking time.
Frequently Asked Questions
Can I use gel food coloring instead of liquid food coloring?
Yes, gel food coloring works beautifully and gives an even deeper red color than liquid coloring. Use about the same amount, one teaspoon, and mix it in with the egg, vanilla, and milk until the color is even. Gel coloring is more concentrated, so start with a little less and add more if the dough does not look red enough. The cookies will bake the same either way.
Do I have to chill the dough before baking?
Chilling the dough for twenty minutes is strongly recommended. Chilling firms up the butter, so the cookies spread slowly in the oven and bake up thick and soft instead of thin and crisp. Without the chill, the butter melts too fast, the cookies spread wide, and the Kisses sit less neatly on top. If your kitchen is warm, chill the dough for thirty minutes for the best shape.
Why do I need to press the Hershey’s Kiss on right after baking?
The Kiss must go on while the cookie is still hot, because the heat softens the chocolate just enough to hold it in place. If you wait until the cookies cool, the Kiss will not stick and will fall off when you pick the cookie up. Unwrap all the Kisses before the cookies go into the oven, so you can press them on the moment the tray comes out.
Can I make the dough ahead of time?
Yes. Mix the dough, cover the bowl tightly, and refrigerate it overnight. You can also roll the dough into balls, coat them in sugar, and refrigerate the balls for up to two days. Let the dough sit on the counter for about ten minutes before rolling so it softens enough to portion, then bake as usual. Making the dough ahead is the easiest way to bake fresh cookies on a busy holiday morning.
Are red velvet blossoms cookies suitable for freezing?
Yes, red velvet blossoms cookies can be frozen for later enjoyment. Freeze the baked cookies in a single layer on a tray until firm, then move them to a freezer bag with the air pressed out. They keep for up to three months. Thaw at room temperature for about thirty minutes, and warm them for ten seconds in the microwave if you want the Kiss soft again. You can also freeze the unbaked dough balls and bake them straight from frozen with two extra minutes.
How do I keep the cookies soft for days?
Store them in an airtight jar at room temperature and keep the lid closed between servings. A slice of bread in the jar helps: the bread dries out first and the cookies stay moist. Do not overbake in the first place, because cookies that come out of the oven soft stay soft longer. Ten seconds in the microwave revives a cookie that has firmed up after a day or two.
Final Thoughts
Red velvet blossoms cookies are the kind of recipe that earns a permanent place in your holiday baking. They are simple enough for a weeknight, festive enough for a party, and flexible enough to make your own with a white chocolate Kiss, a peppermint Kiss, or a drizzle of white chocolate. The ingredients are pantry staples and a bag of Kisses, the method is one bowl and twelve steps, and the result is a tray of soft, chewy red cookies that look like Christmas.
Bake a batch this week and see how fast they disappear. Pack some in a cookie box for a neighbor, save some for the dessert table, and keep a few warm for yourself with a mug of hot chocolate. For more seasonal baking, explore our Easy Winter Dessert Recipes and our Easy Winter Cookie Recipes for Cozy Holiday Baking. Happy baking, and happy holidays.