

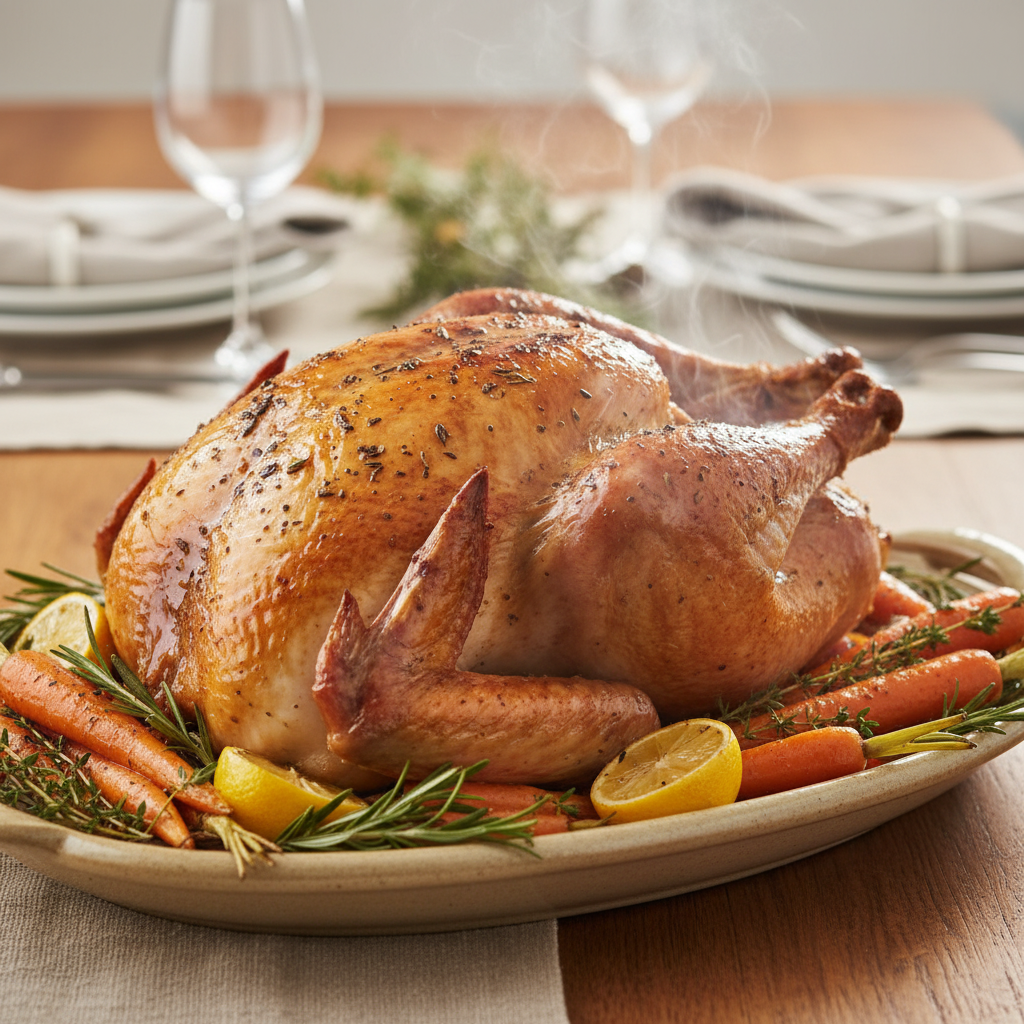
Roasting a turkey can feel a little scary at first. But the Martha Stewart roast turkey recipe makes it simple and enjoyable, and the turkey turns golden, juicy, and full of flavor. A 12–14 lb bird, six tablespoons of softened butter mixed with fresh thyme, rosemary, and sage, and a steady 325°F oven are all it takes: about three hours of roasting with a baste every thirty minutes, until the thickest part of the thigh reads 165°F. This guide covers the Martha Stewart roast turkey recipe in full depth, from the exact ingredients and the twelve-step method to variations, what to serve with it, and how to store the leftovers.
If you want to learn how to roast a turkey that comes out golden on the outside and juicy on the inside, you are in the right place. The prep takes about twenty-five minutes, the roast takes about three hours, and the whole dish is ready in about three hours and twenty-five minutes. It serves ten — the recipe overview says ten to twelve people — at about 420 calories a serving, and it uses only fourteen simple ingredients. Follow the steps below and a whole turkey becomes surprisingly easy, even for a first-time host.
For a smaller turkey option for a small gathering, see our Easy Turkey Breast with Cranberry Orange Sauce for Thanksgiving.
The full original recipe this guide is based on is the Martha Stewart Roast Turkey Recipe, with the same ingredients, times, and method used below.
Why Martha Stewart Roast Turkey Belongs on the Thanksgiving Table
Roast turkey is the centerpiece of Thanksgiving, and it is also the dish most cooks worry about. A whole bird is big, it takes hours, and everyone has a story about a dry one. This recipe takes that worry away by keeping everything simple and reliable: one steady oven temperature, one herb butter, one thermometer reading, and one rest. That is the whole method. There is no brining bucket, no special equipment, and no guesswork.
The recipe became popular because it is simple and reliable, and the cook behind it tells the story plainly: the first time she made this turkey was during a family holiday dinner, and she was nervous, because roasting a whole turkey felt like a big challenge. But when it came out of the oven, the skin looked perfectly golden, the kitchen smelled amazing, and everyone asked for seconds. Since that day, this turkey has become her go-to recipe for special meals. That is the kind of recipe you want on Thanksgiving: one that has already survived a nervous first attempt and came out golden.
This turkey also suits every kind of holiday table. The original recipe lists the occasions itself: Thanksgiving dinner, Christmas family meals, large family gatherings, Sunday dinner parties, and holiday celebrations. Whenever you serve it, the turkey becomes the star of the table — and because the method is the same every time, it becomes easier with every year you make it.
What Makes This Roast Turkey So Good
The first thing you notice about this turkey is the skin: golden, crisp, and fragrant with herbs. Underneath it, the meat stays juicy, because the herb butter does two jobs at once. Some of it goes under the skin, where it melts slowly into the breast meat and keeps it moist. The rest goes over the outside, where it helps the skin crisp and brown. The onion, lemon, and garlic stuffed into the cavity steam gently as the bird roasts, adding flavor from the inside, while the carrots and celery in the pan add aroma and keep the drippings rich.
The flavor is built from fresh herbs and simple seasoning: six tablespoons of softened unsalted butter, fresh thyme leaves, fresh rosemary, and fresh sage, with salt and black pepper. The herbs give the turkey its lovely aroma, and the butter carries that flavor into the meat. Two cups of chicken broth poured into the roasting pan keep the oven moist and give you pan juices to baste with every thirty minutes. That regular basting is what builds the beautiful golden skin, layer by layer, through the three-hour roast.
The recipe is also forgiving in the ways that matter. The oven stays at one temperature, 325°F, for the whole roast, so there is nothing to adjust and nothing to forget. The thermometer gives you one clear number to aim for: 165°F in the thickest part of the thigh. And the twenty-minute rest at the end is built into the method, so the turkey has time to settle before carving. Follow those three fixed points — 325°F, 165°F, twenty minutes — and the turkey takes care of itself.
The Secret Is Butter Under the Skin
The original recipe states its secret plainly, and it is worth repeating in full: take your time and season well. Many people rush when roasting turkey, and that can make the meat dry. But patience makes a big difference. The two patience steps are the butter and the rest, and both are in the method below.
Butter under the skin is the first secret. Gently lift the skin near the breast and spread some of the herb butter underneath it. The butter sits directly against the breast meat, and as it melts it bastes the meat from the inside, keeping it juicy through a three-hour roast. Herbs mixed into the butter add a lovely aroma that spreads through the whole bird. The rest of the butter goes over the outside, with olive oil on top and a little extra salt and pepper, which is what makes the skin crisp and golden.
Resting the turkey after roasting is the second secret. Let it sit for at least twenty minutes, loosely covered in foil, before you carve. This keeps the juices inside the meat instead of letting them run out onto the cutting board. A turkey carved straight from the oven will look dry on the plate no matter how well it was roasted; a turkey that has rested will be juicy in every slice. Trust these little tricks — they change everything.
Ingredients You Will Need
This recipe serves ten — the recipe overview says ten to twelve people, and the recipe card says ten — and the ingredients below are exactly the ones in the original Martha Stewart Roast Turkey Recipe. Use fresh items for the best flavor.
- 1 whole turkey (12–14 pounds)
- 6 tablespoons unsalted butter, softened
- 2 tablespoons olive oil
- 2 teaspoons salt
- 1 teaspoon black pepper
- 1 tablespoon fresh thyme leaves
- 1 tablespoon fresh rosemary, chopped
- 1 tablespoon fresh sage, chopped
- 1 large onion, quartered
- 1 lemon, cut in half
- 4 garlic cloves
- 2 carrots, cut into chunks
- 2 celery stalks, cut into chunks
- 2 cups chicken broth
A few notes on the ingredients will help you get the best result. Buy a 12–14 lb turkey, and check that it is fully thawed before you start — a frozen or partly frozen bird will not cook evenly. Use fresh herbs, as the recipe advises, because fresh thyme, rosemary, and sage give a stronger flavor than dried. The butter should be softened, not melted, so it mixes smoothly with the salt, pepper, and herbs into a spreadable paste. The onion, lemon, and garlic go inside the cavity, not into the pan, where they create steam and flavor while the turkey roasts. The carrots and celery go into the roasting pan underneath the rack, and the chicken broth goes into the pan too, to keep the turkey moist and to give you juices for basting.
Equipment You Will Need
You do not need any special equipment for roast turkey. The original recipe uses a large roasting pan with a rack, kitchen twine, a meat thermometer, and a few kitchen basics, and that is all it takes.
- Large roasting pan, for the turkey and the pan vegetables
- Roasting rack, for holding the turkey above the pan
- Kitchen twine, for tying the legs together
- Meat thermometer, for checking the 165°F target
- Basting brush or spoon, for basting every 30 minutes
- Cutting board, for carving
- Sharp carving knife, for slicing the breast and legs
- Aluminum foil, for covering the turkey loosely while it rests
- Small mixing bowl, for the herb butter
A few notes on the equipment will help. The meat thermometer is the one item you should not skip: the recipe gives one doneness target, 165°F in the thickest part of the thigh, and only a thermometer can tell you when the turkey has reached it. A roasting rack matters because it lifts the turkey out of the pan juices and lets hot air circulate around the whole bird, which is what makes the skin crisp all over. Kitchen twine is a small thing with a real job: tying the legs together keeps the turkey’s shape nice and helps it cook evenly. If you do not have twine, the legs can simply be tucked, but the tied shape roasts more evenly.
How to Make Martha Stewart Roast Turkey
Follow these twelve steps in order and the turkey will come out golden, juicy, and full of flavor every time. The steps follow the original recipe exactly, with the two buttering steps combined into one, so nothing is rushed and nothing is skipped.
Step 1: Prepare the turkey. Remove the turkey from the fridge 30 minutes before cooking and pat it dry using paper towels. This step helps the skin roast better and become golden. A dry surface browns; a wet surface steams. Letting the bird lose its chill also helps it cook more evenly.
Step 2: Preheat the oven to 325°F (165°C). A steady temperature cooks the turkey slowly and evenly, and that is what keeps the meat tender and juicy. Give the oven time to reach temperature before the turkey goes in, and leave it at 325°F for the whole roast — there is nothing to adjust later.
Step 3: Make the herb butter. Mix the six tablespoons of softened butter with the two teaspoons of salt, the teaspoon of black pepper, the tablespoon of fresh thyme leaves, the tablespoon of chopped fresh rosemary, and the tablespoon of chopped fresh sage in a small bowl. Stir well until smooth. This herb butter adds amazing flavor to the turkey, and it is used in the next step both under the skin and over the outside.
Step 4: Butter the turkey under the skin and all over. Gently lift the turkey skin near the breast and spread some of the herb butter under the skin. This step keeps the meat moist while roasting. Then rub the remaining butter over the whole turkey, add the two tablespoons of olive oil on top, and sprinkle a little extra salt and pepper for a crispy skin. The butter under the skin bastes the breast from the inside; the butter and oil outside crisp the skin.
Step 5: Stuff the cavity. Place the quartered onion, the halved lemon, and the four garlic cloves inside the turkey cavity. These ingredients create steam and flavor while cooking, perfuming the meat from the inside as the bird roasts. Do not pack the cavity tightly — the aromatics need room for the hot air to move around them.
Step 6: Prepare the roasting pan. Place the chunked carrots and celery stalks in the roasting pan and set the roasting rack on top. The vegetables lift the rack slightly and add aroma to the pan, and the rack helps air circulate around the turkey so the skin crisps all over instead of steaming on the bottom.
Step 7: Tie the turkey legs. Use kitchen twine to tie the turkey legs together. This keeps the shape nice and helps the turkey cook evenly, so the legs and the breast finish at the same time instead of the legs drying out while the breast catches up.
Step 8: Place the turkey in the oven. Put the turkey breast-side up on the rack and pour the two cups of chicken broth into the pan. The broth keeps the turkey moist while roasting and gives you pan juices for basting. Slide the pan into the preheated oven.
Step 9: Roast the turkey for about 3 hours. Roast the turkey for about three hours, basting the turkey with pan juices every 30 minutes. Use a basting brush or a spoon to scoop the juices from the pan and drizzle them over the breast and legs. This regular basting helps create beautiful golden skin, layer by layer.
Step 10: Check the temperature — 165°F in the thigh. Insert a meat thermometer into the thickest part of the thigh, away from the bone. It should read 165°F (74°C). That means the turkey is fully cooked. Check in more than one spot for accuracy, and do not rely on color or time alone — the thermometer is the only sure test.
Step 11: Let the turkey rest for 20 minutes. Remove the turkey from the oven, cover it loosely with foil, and rest for twenty minutes. This step keeps the meat juicy, because the juices that were driven toward the center by the heat settle back through the meat while it rests. Do not carve early: a turkey carved straight from the oven loses its juices onto the board.
Step 12: Carve and serve. Place the turkey on a large cutting board. Slice the breast meat first, then the legs. Serve warm and enjoy this classic dish. Carve only what you need for the table and keep the rest on the bird, so the remaining meat stays warm and moist.
Tips for Perfect Roast Turkey Every Time
These five tips come from the original recipe, and they are the difference between a good turkey and a great one.
First, use fresh herbs for stronger flavor. Fresh thyme, rosemary, and sage carry more aroma than dried herbs, and that aroma is what fills the kitchen and flavors the meat. Pick the leaves fresh, chop them just before mixing the butter, and do not substitute dried herbs if you can help it.
Second, add orange slices inside the turkey for a citrus taste. Tuck a few orange slices into the cavity alongside the onion, lemon, and garlic. The citrus adds a bright, fresh note to the meat and a lovely scent to the kitchen, and it pairs beautifully with the herbs in the butter.
Third, brine the turkey overnight for extra juiciness. If you have the time and the fridge space, brine the bird the night before roasting. A brined turkey holds more moisture through a three-hour roast, and the meat comes out noticeably juicier. Pat the turkey very dry after brining, so the skin can still crisp.
Fourth, place bacon strips on top for richer flavor. Lay a few strips of bacon across the breast before the turkey goes into the oven. The bacon bastes the breast as it cooks, adding richness and a smoky note, and it crisps up beautifully by the time the turkey is done.
Fifth, add potatoes to the roasting pan for an easy side dish. Tuck chunked potatoes around the carrots and celery in the pan, and they will roast in the turkey drippings while the bird cooks. They come out golden and full of flavor, and they save you a pot on the stove.
Variations to Try
Once you have roasted the classic version, these variations use the same herb butter and the same method, so they are easy to try.
Citrus herb turkey: add orange slices inside the cavity, as the recipe’s own tips suggest, and add a teaspoon of orange zest to the herb butter. The citrus brightens the rich butter and herb flavor, and the kitchen smells wonderful while it roasts.
Bacon-topped turkey: lay bacon strips across the breast before roasting, as the recipe’s tips suggest. The bacon bastes the breast as it cooks and crisps up by the end, adding a smoky, salty layer that guests love. Remove the bacon for the last thirty minutes if you want the skin underneath to crisp further.
Brined turkey: brine the turkey overnight for extra juiciness, as the recipe’s tips suggest, then pat it very dry before buttering. A brined bird holds more moisture through the long roast. Remember to go easy on extra salt in the herb butter if your brine was salty.
Pan-potato turkey: add chunked potatoes to the roasting pan alongside the carrots and celery, as the recipe’s tips suggest. The potatoes roast in the turkey drippings and come out golden and full of flavor — a side dish that cooks itself while the bird roasts. For another potato side on the same table, our Easy Sweet Potato Casserole for Thanksgiving brings a sweet, creamy contrast to the savory bird.
What to Serve with Roast Turkey
Roast turkey tastes even better with classic side dishes, and the original recipe names six pairings that create a perfect dinner table.
Creamy mashed potatoes are the first pairing, and the one no Thanksgiving table is complete without. Buttery, smooth potatoes catch the turkey juices and the gravy, and they balance the savory bird. For the full guide, see our Easy Mashed Potatoes for Thanksgiving.
Garlic roasted vegetables are the second pairing. Roasted until golden at the edges, they add a savory, caramelized note that stands up to the rich turkey without competing with it. Use whatever vegetables you have — carrots, parsnips, and Brussels sprouts all roast beautifully.
Homemade cranberry sauce is the bright contrast. Its tartness cuts through the richness of the turkey and the butter, and a spoonful alongside each slice wakes up the whole plate. Our Easy Cranberry Relish for the Holidays brings Martha Stewart’s bright, tart relish to the same table.
Butter dinner rolls are the comfort pairing. Warm, soft rolls are made for sopping up pan juices and for building the next day’s leftover turkey sandwiches. Bake them while the turkey rests, so they come out of the oven as the bird is carved.
Green bean casserole is the creamy, savory classic. Our Easy Paula Deen Green Bean Casserole for Thanksgiving brings the version with the most fans at the table.
Cornbread stuffing is the final pairing. Our Easy Corn Pudding for Thanksgiving brings a sweet, creamy corn side that sits happily next to the stuffing on a full holiday plate. Together, these six sides create a perfect dinner table.
Make-Ahead and Storage
This turkey is easy to plan ahead, and the leftovers are some of the best of the holiday.
You can season the turkey the night before. The recipe’s own FAQ says yes: season the turkey the night before, keep it covered in the refrigerator, and the flavors soak into the meat overnight. In the morning, take it out thirty minutes before cooking, pat it dry, and roast as usual. That thirty-minute rest out of the fridge is already step one of the method.
For leftovers, the recipe gives clear storage and reheating tips. Store leftover turkey in an airtight container, keep it in the refrigerator for up to 4 days, and freeze sliced turkey for up to 3 months. To reheat, warm it in the oven at 300°F for gentle warming, and add a little broth before reheating to keep the meat moist. The low oven and the added broth are the key: high heat will dry out already-cooked turkey, while a gentle warm-up with broth keeps it juicy. Leftover turkey is also the start of the best day-after meals — sandwiches, soup, and the turkey hash that many families love more than the original dinner.
Nutrition at a Glance
The original recipe lists a full nutrition table, and this guide reports it exactly: per serving, 420 calories, 45 g protein, 24 g fat, 4 g carbohydrates, and 520 mg sodium. No other nutrition values are listed on the recipe, so this guide does not invent any.
What those numbers tell you is that this is a lean, protein-rich main course. A 12–14 lb turkey serves ten, and each serving carries 45 grams of protein — the bulk of the meal’s nutrition — with only 4 grams of carbohydrate, because the bird itself has almost no carbs. The 24 grams of fat come mostly from the butter and the skin; if you want a lighter plate, take the skin off your serving and skip the extra butter on top. The 520 mg of sodium comes from the salt in the herb butter and the broth, which is moderate for a holiday main. Pair the turkey with vegetables and cranberry sauce, and the plate stays balanced without feeling heavy.
Frequently Asked Questions
How long does it take to roast a turkey?
Cooking time depends on the turkey size. A 12–14 pound turkey usually takes about three hours at 325°F — the recipe card gives 25 minutes of prep, 3 hours of cooking, and 3 hours and 25 minutes in total. Always check the internal temperature for safe cooking, because ovens and bird shapes vary, and the thermometer is the final word.
Should I cover the turkey with foil while roasting?
You can cover the turkey loosely with foil if it browns too quickly. Remove the foil during the last 30 minutes for crispy skin. If the skin is browning evenly, leave it uncovered so it crisps fully. The foil is a tool for managing color, not a step you must take.
How do I keep the turkey from drying out?
Spread butter under the skin and baste the turkey regularly — every thirty minutes with the pan juices — and let the turkey rest for twenty minutes after roasting. The butter under the skin bastes the breast from the inside, the regular basting keeps the outside moist and builds golden skin, and the rest lets the juices settle back into the meat. All three steps are in the recipe itself.
Can I prepare the turkey ahead of time?
Yes. You can season the turkey the night before. Keep it covered in the refrigerator, and the flavors soak into the meat overnight. In the morning, take it out thirty minutes before cooking, pat it dry, and roast as usual. For an even juicier bird, the recipe’s tips suggest brining the turkey overnight instead — just pat it very dry before buttering so the skin can still crisp.
What thermometer temperature means the turkey is done?
The turkey is ready when the thickest part of the thigh reaches 165°F (74°C). Always check in more than one spot for accuracy, and keep the thermometer away from bone, which reads hotter than the meat. When every spot reads 165°F, the turkey is fully cooked and safe to serve.
Can I use a smaller or larger turkey with this recipe?
Yes, with one adjustment: the cooking time changes with the size of the bird, but the method and the temperature do not. A smaller turkey will finish sooner than three hours, and a larger one will take longer. Keep the oven at 325°F, baste every thirty minutes, and let the thermometer decide — 165°F in the thickest part of the thigh, checked in more than one spot. The herb butter quantities scale easily: for a much larger bird, make a little more butter so you can coat it fully.
Final Thoughts
The Martha Stewart Roast Turkey Recipe is a classic dish that never fails. The turkey turns golden, juicy, and full of flavor, and once you learn how to make it, it becomes surprisingly easy. With simple ingredients and a steady method — one oven temperature, one herb butter, one thermometer reading, and one rest — anyone can cook a beautiful holiday meal.
Give this recipe a try and enjoy every delicious bite with family and friends. And if your table wants a second main course instead of turkey, our Easy Thanksgiving Prime Rib for the Holidays brings a garlic-herb crusted roast to the same table, with the same simple method and the same show-stopping result.